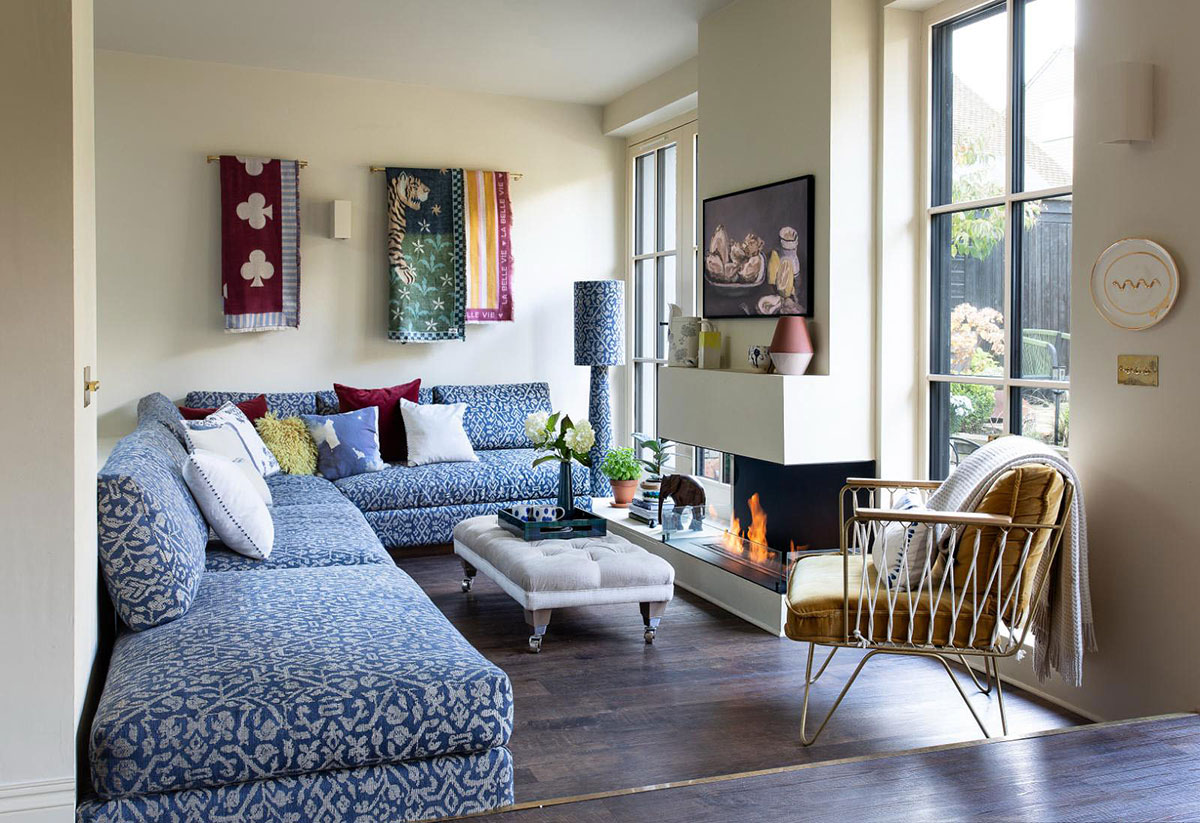
A conversation pit has, quite literally, been on my moodboard for years. It was a non-negotiable for me way back when we started planning the extension with our architect and, whilst most of my other whimsical dreams fell by the wayside eventually due to either practical or budgetary reasons, the sunken lounge remained.
Creating a space within the open plan layout to give that sense of coorieing in (a Scottish word meaning to nestle or snuggle) was so important to me and, to fully embrace the retro theme, I wanted a giant, built-in, patterned sofa.
The road was not a simple one with a room devoid of a right angle (the exterior wall runs at 95 degrees to follow the boundary line) and a budget to work to. You see, no readymade solution was ever going to snugly fit this space and maximise seating options and my investigations into a custom built solution were coming in the range of £12-15k so, as with many projects in this home, we embarked upon what seemed like an extremely ambitious DIY.
What follows below is not just the lengthiest blog post I’ve ever shared but all the details of how we finally built this behemoth and how much it actually cost…
Ph. Alison & Douglas Gibbs
HOW WE BUILT IT
THE FRAME – TIMBER
Please remember that we are NOT joiners or even experts in the DIY field – we are simply two humans with a desire to create beautiful things on a budget for our home. So whilst this may not be the ‘correct’ way to construct a sofa, this is how we did it.
First of all, buy this book – alongside a never ending stream of youtube videos, it was my bible.
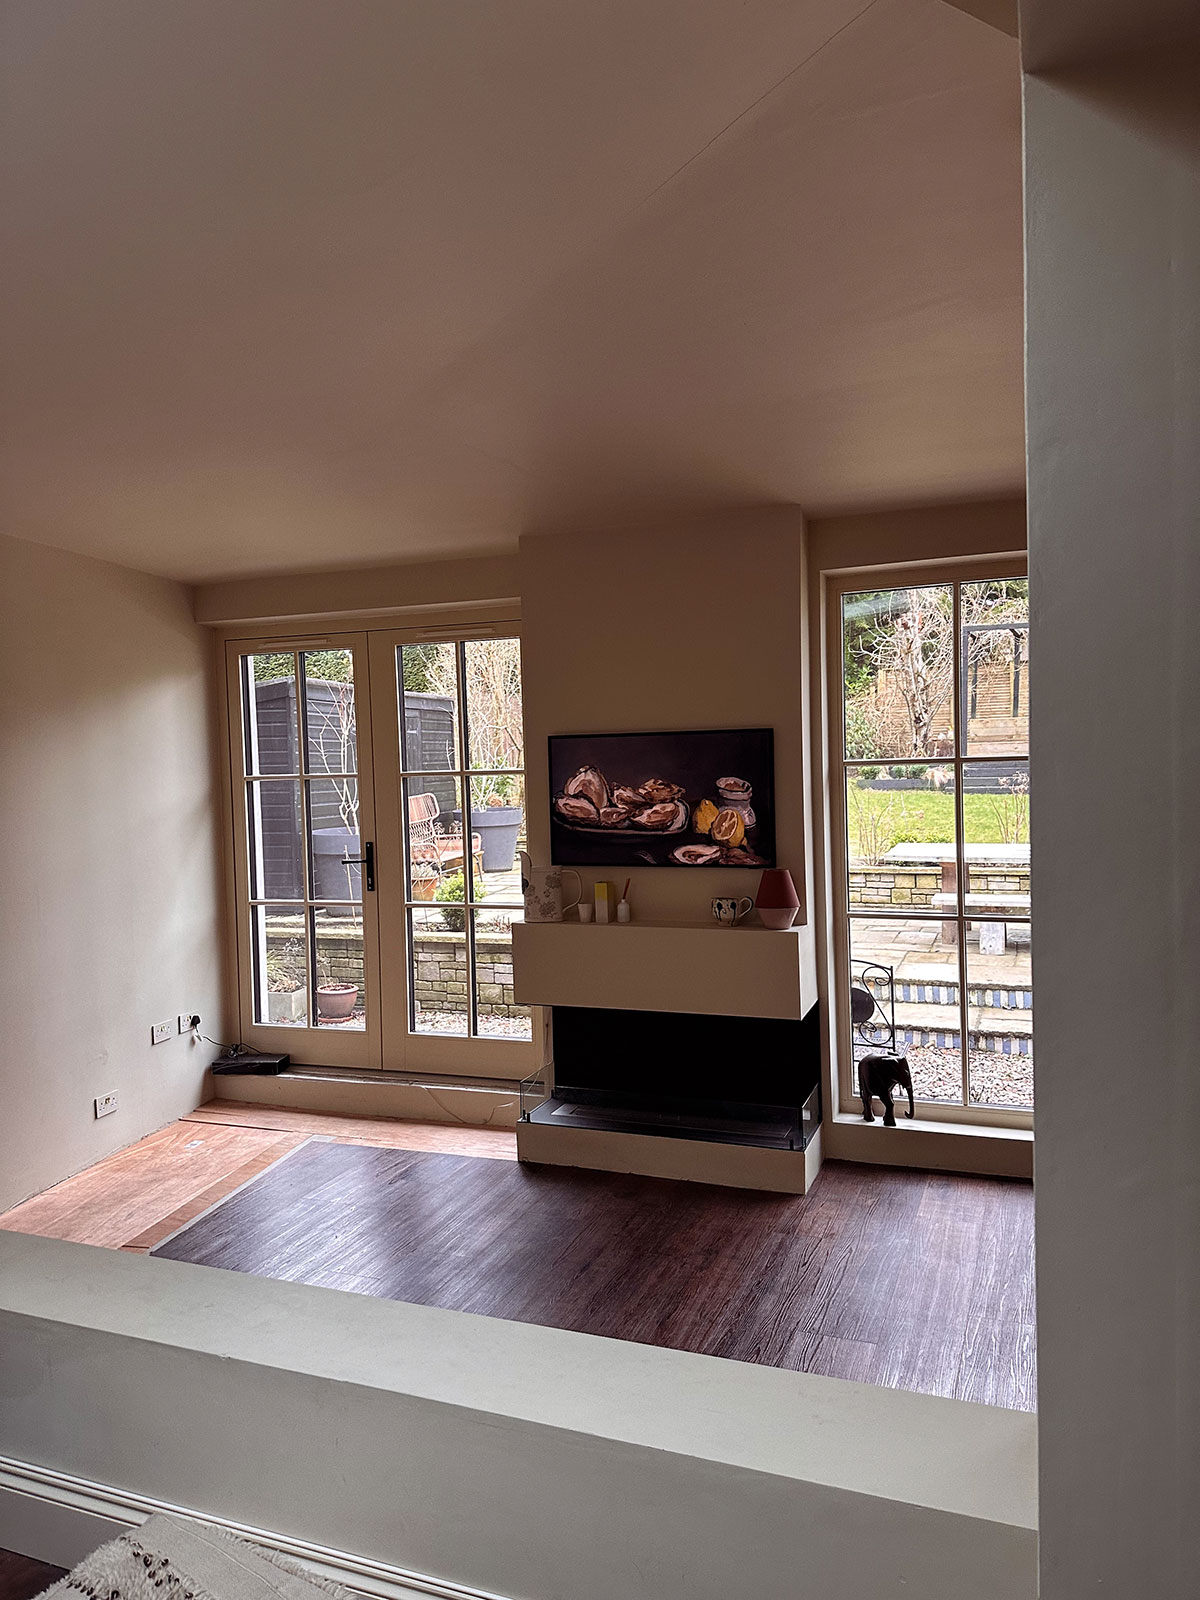
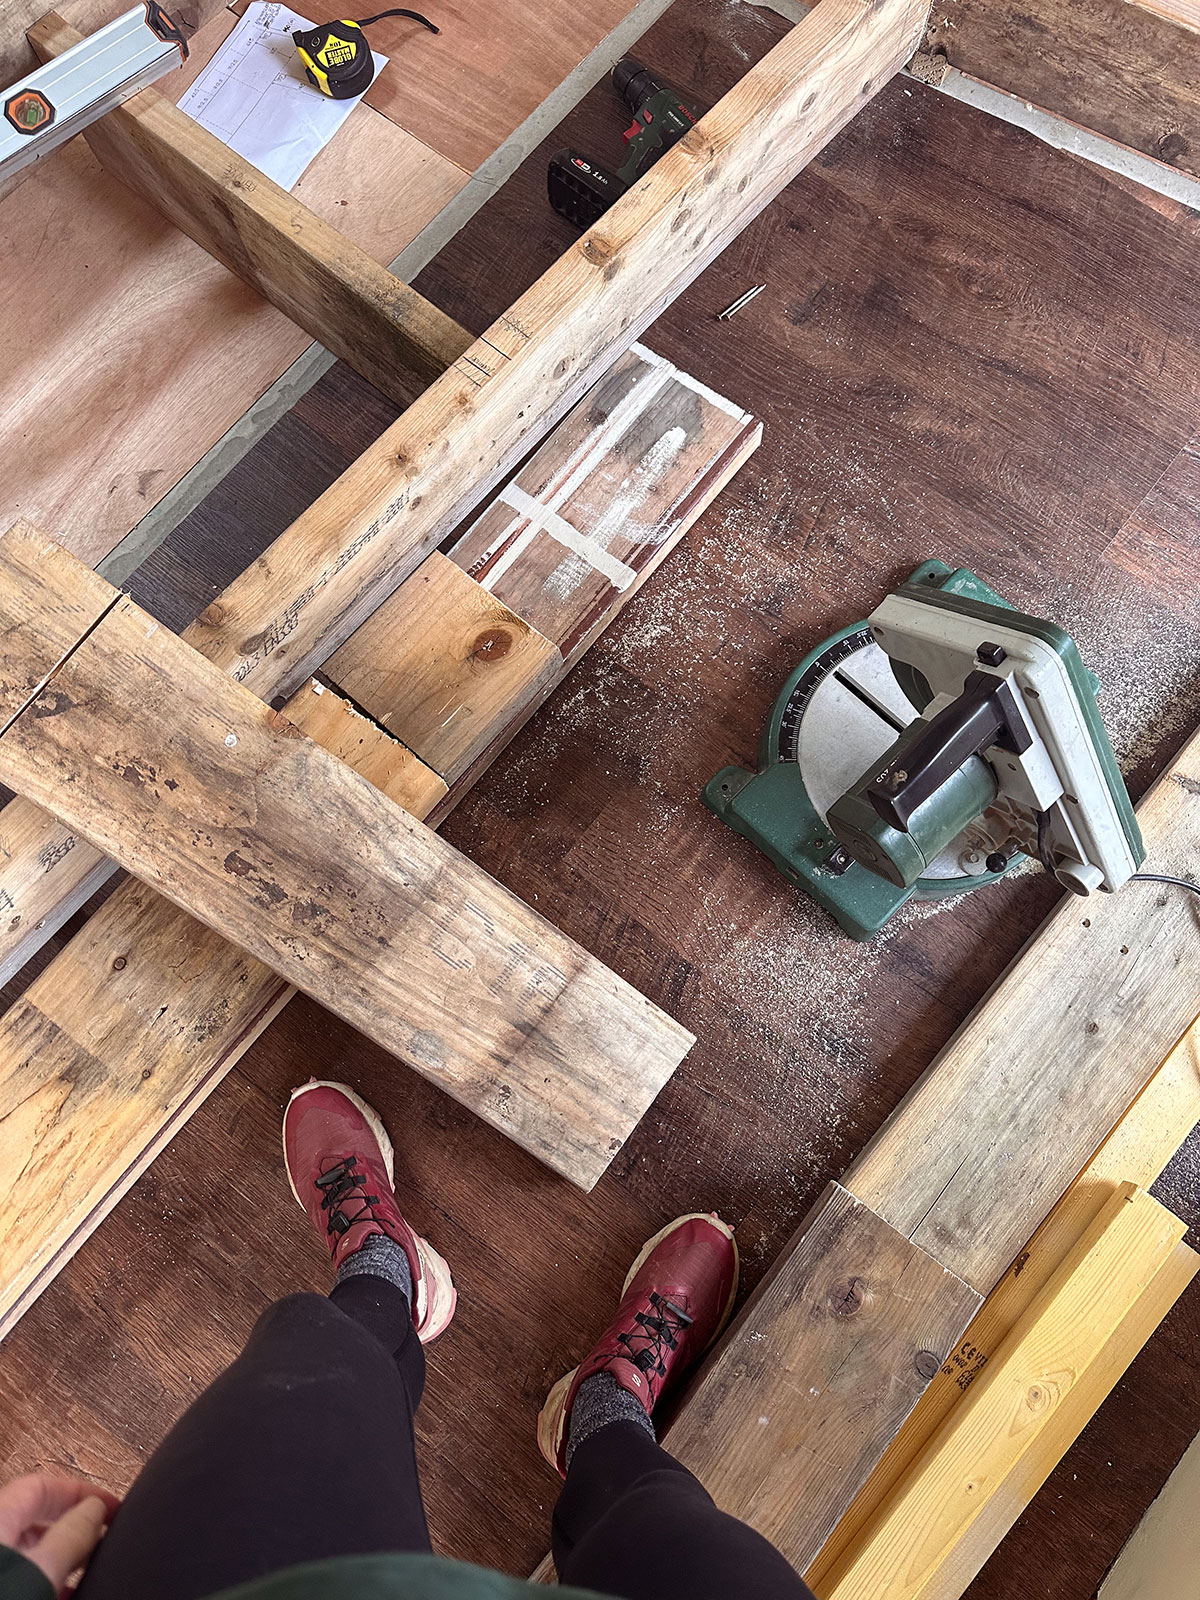
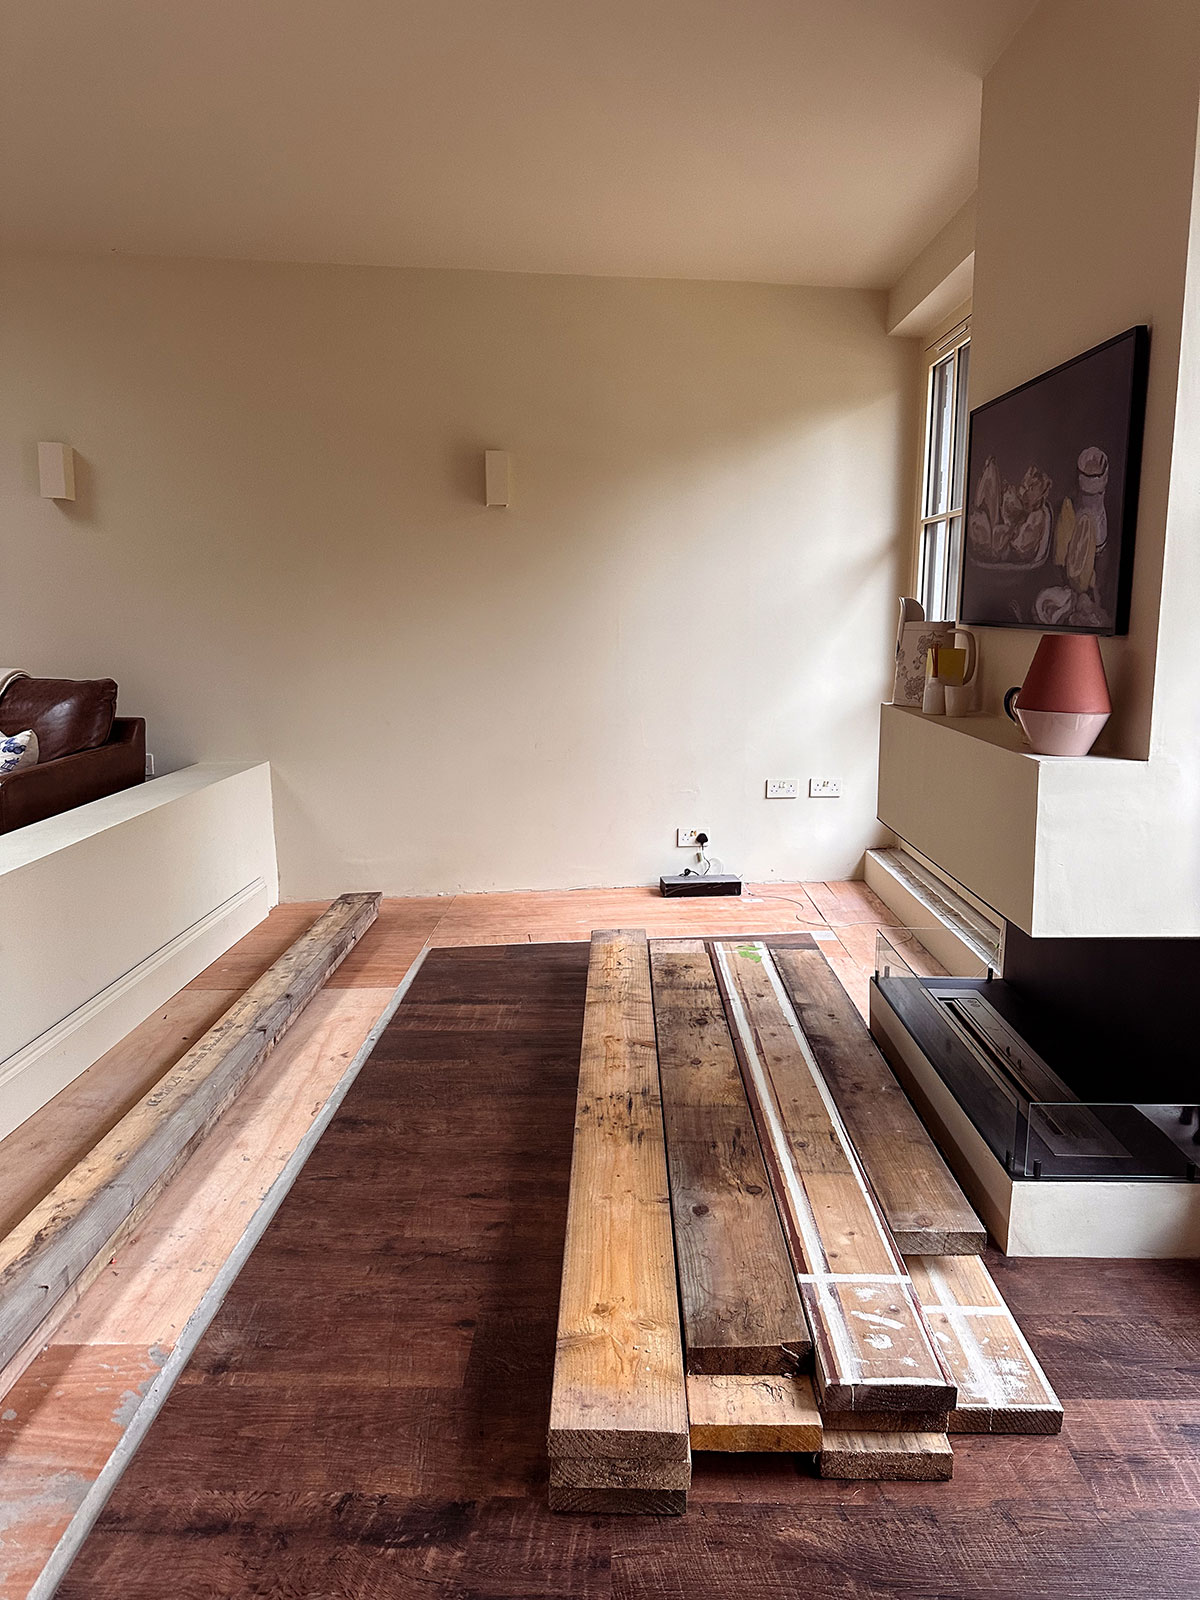
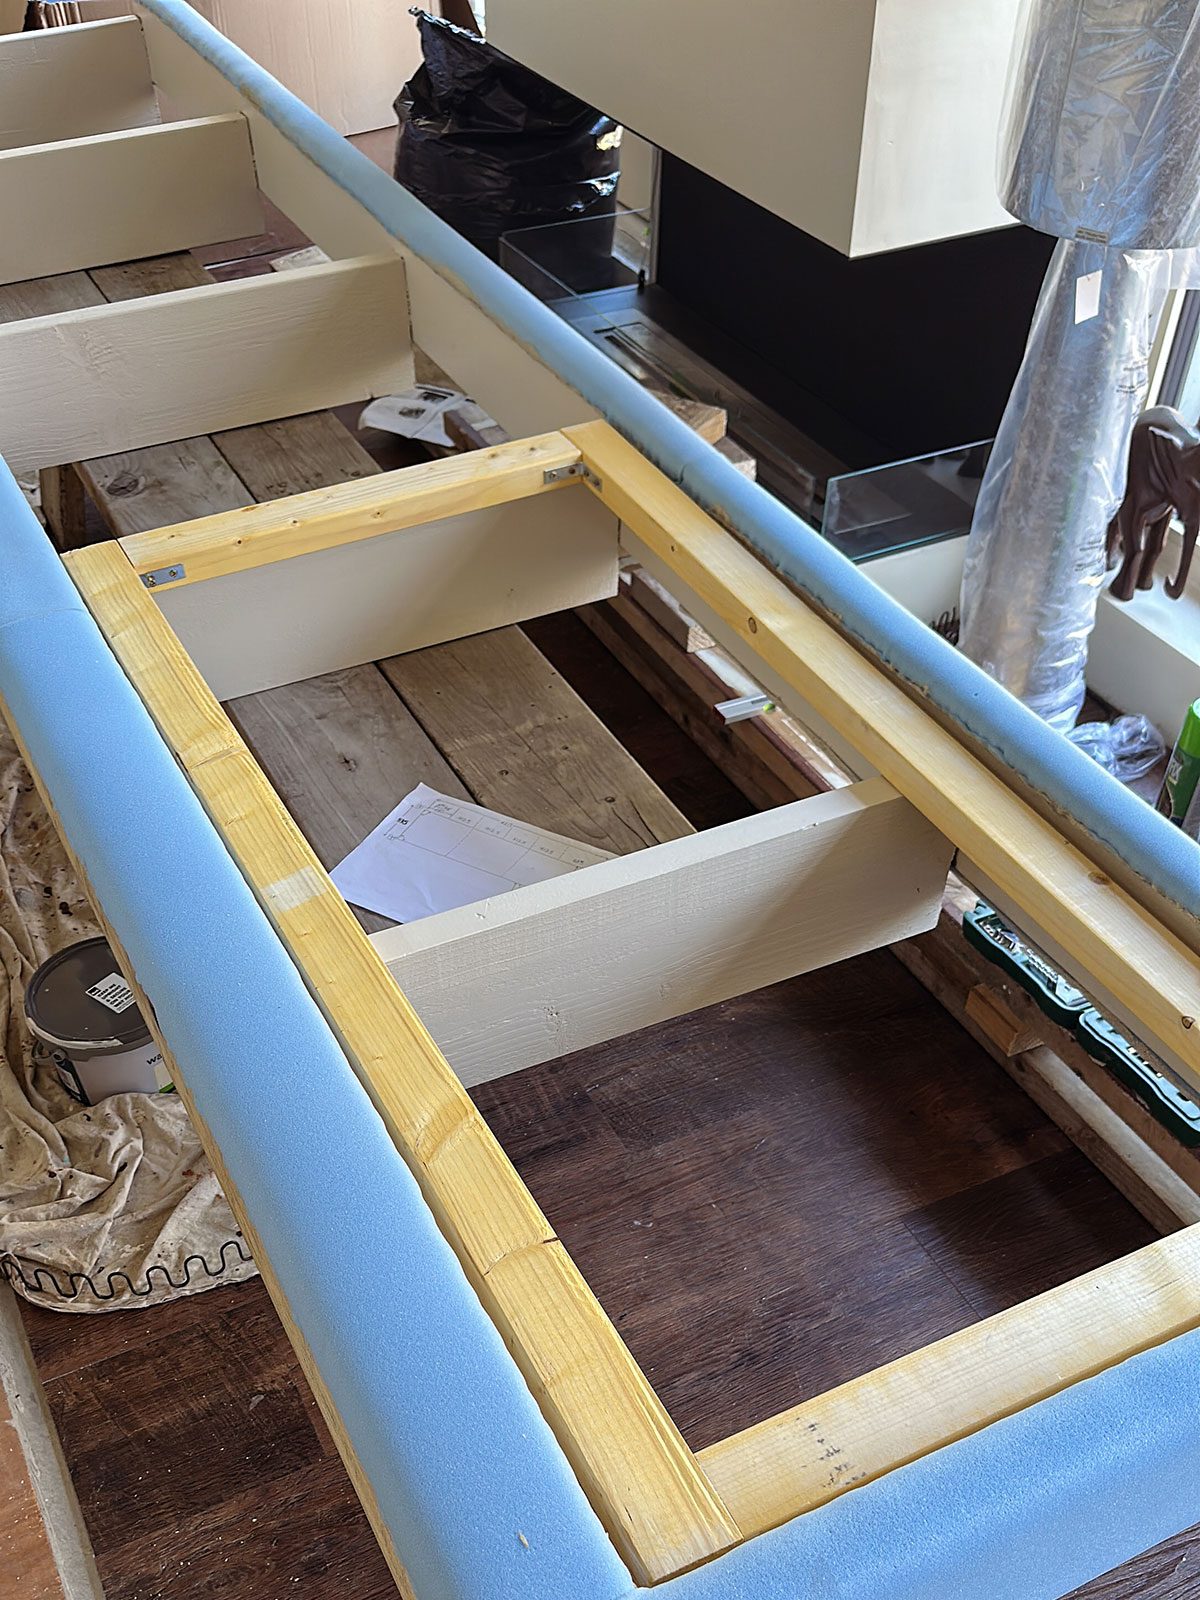
Below you can see the space as it began (and how we lived with it for two years) as well as the pile of leftover timbers from our house built. Certainly this bulk of timber is not needed for this project but, in an effort to save money and use what we had, we forged ahead and built a very substantial couch with it.
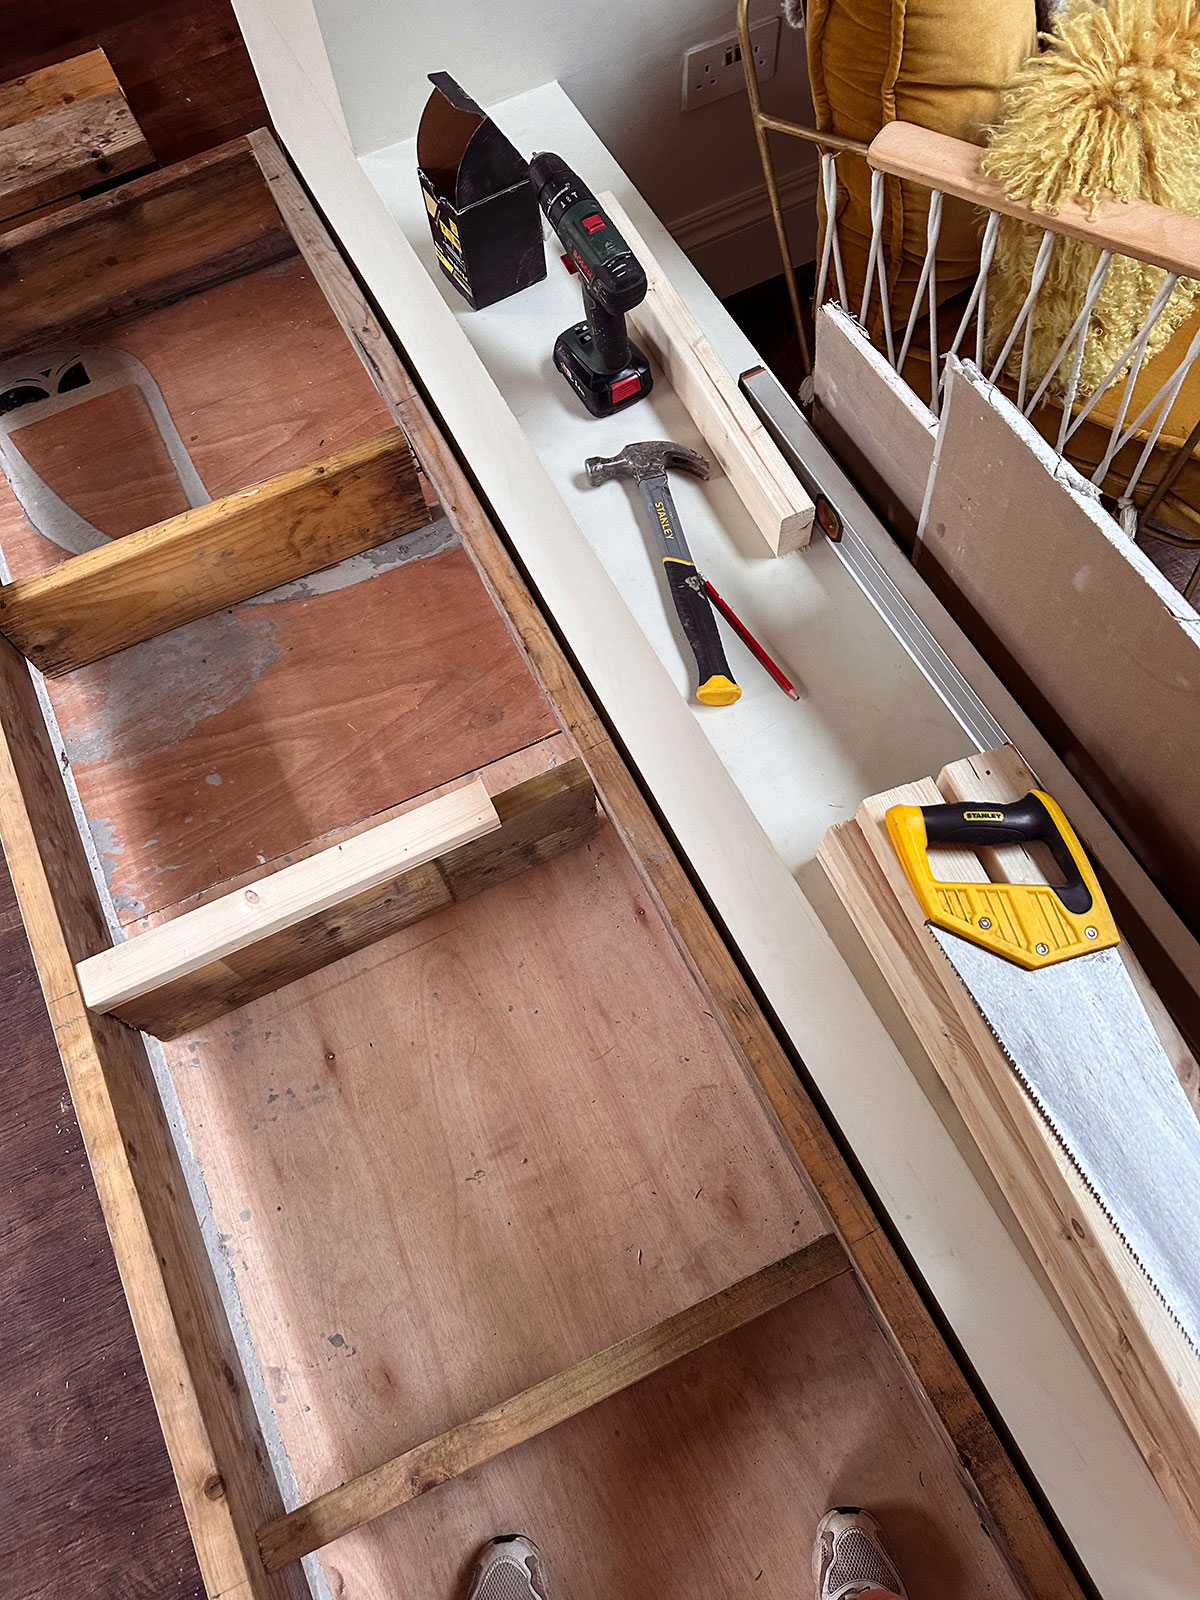
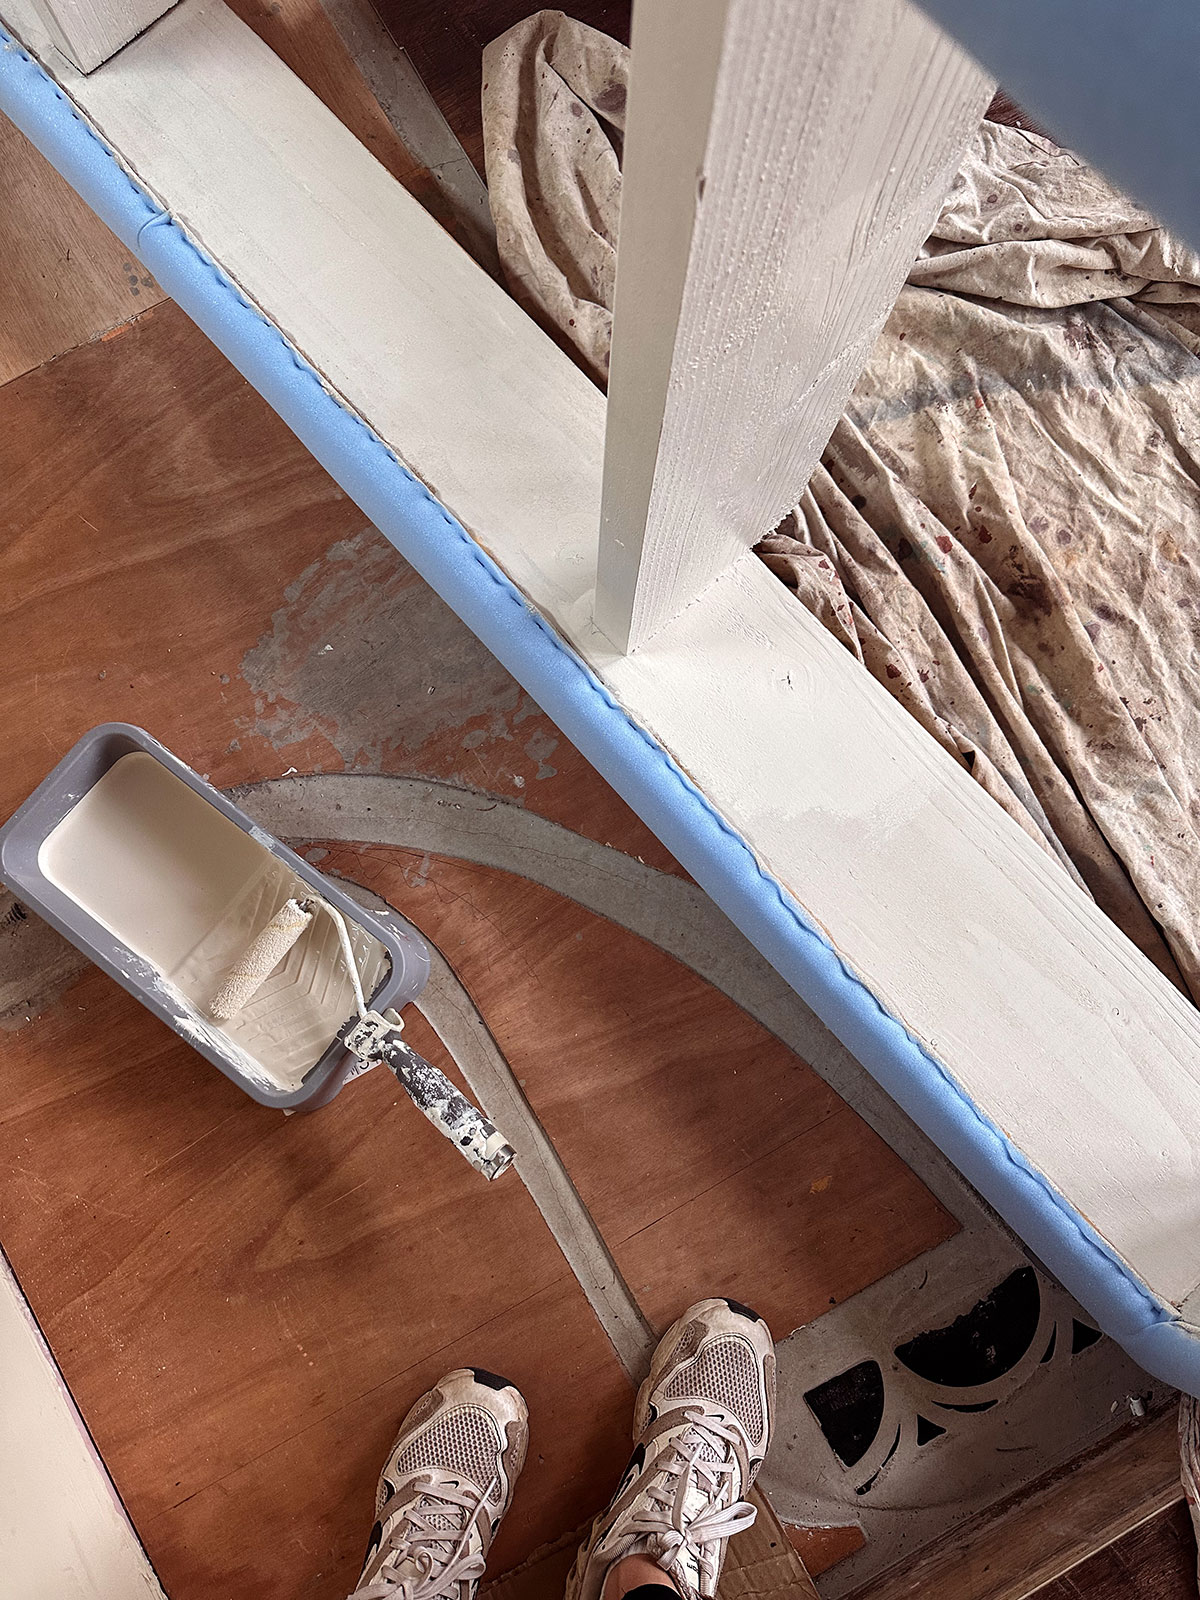
With a circular saw and many 70mm stainless steel screws we constructed a crude frame to form the base of the sofa. The cross bars intentionally sit lower than the outer frame to allow for a shallow kickboard – it didn’t feel practical to me to have fabric meeting the floor in a family home, with a dog, in Scotland. Some of the timbers were a little warped so the joins aren’t perfect but, it turns out, upholstery really can dress up an ugly foundation pretty nicely.
THE FRAME – FOAM & FABRIC
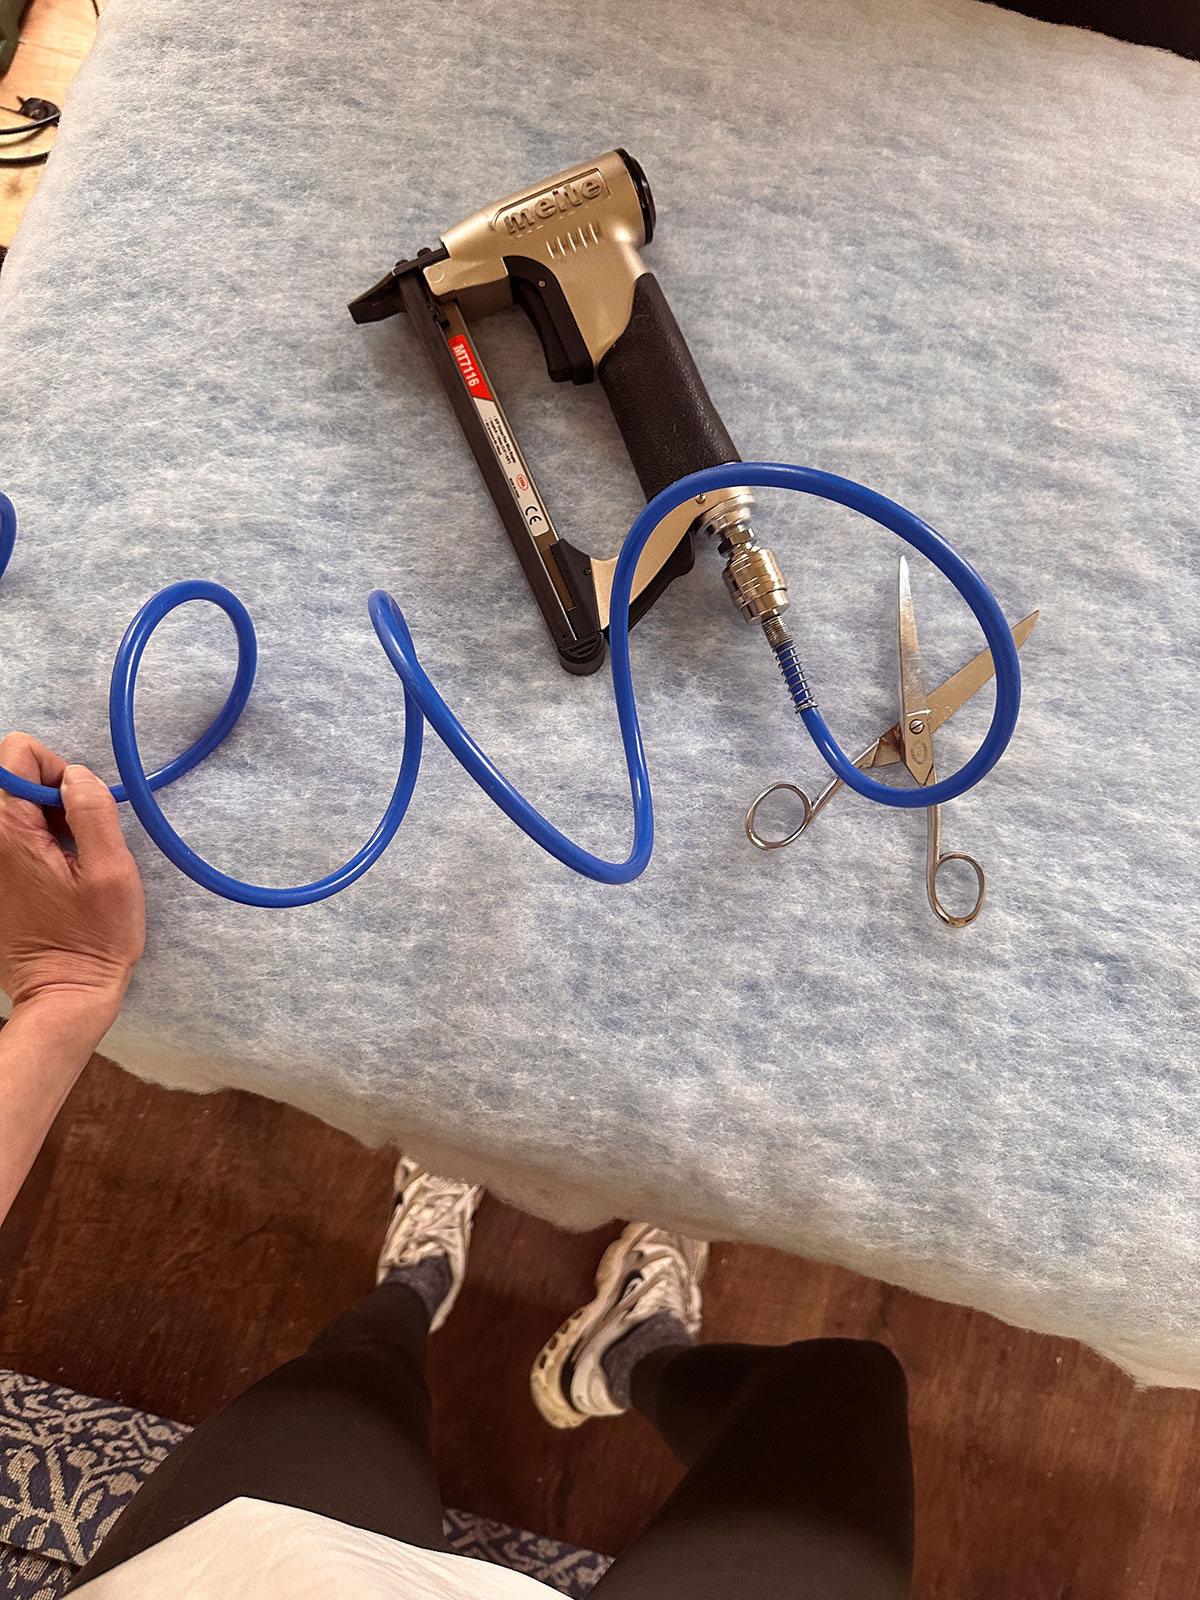
I bought a pneumatic stapler which turned out to be an excellent investment because we got through approximately 1500 staples in this project alone. Fortunately we already had an air compressor – who knows why… oh right, for the husband to dry his bicycles (?!) – anyway, rather handy in this instance.
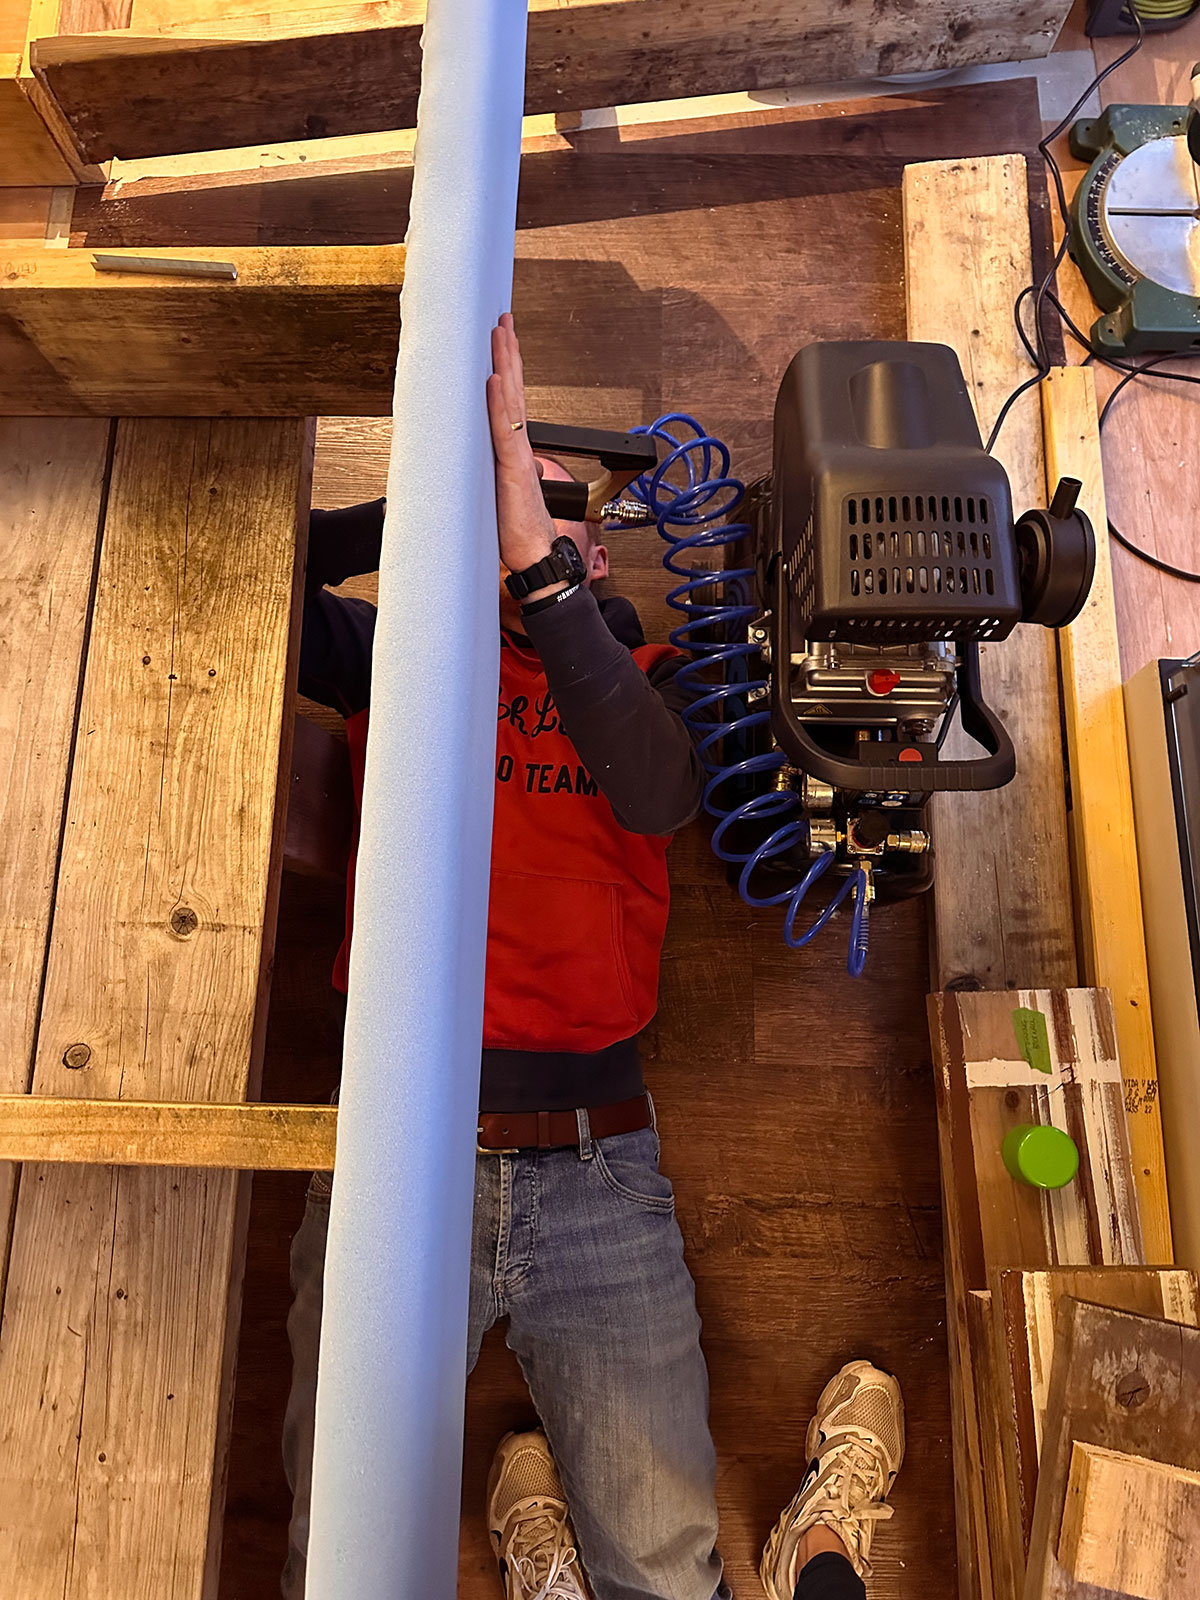
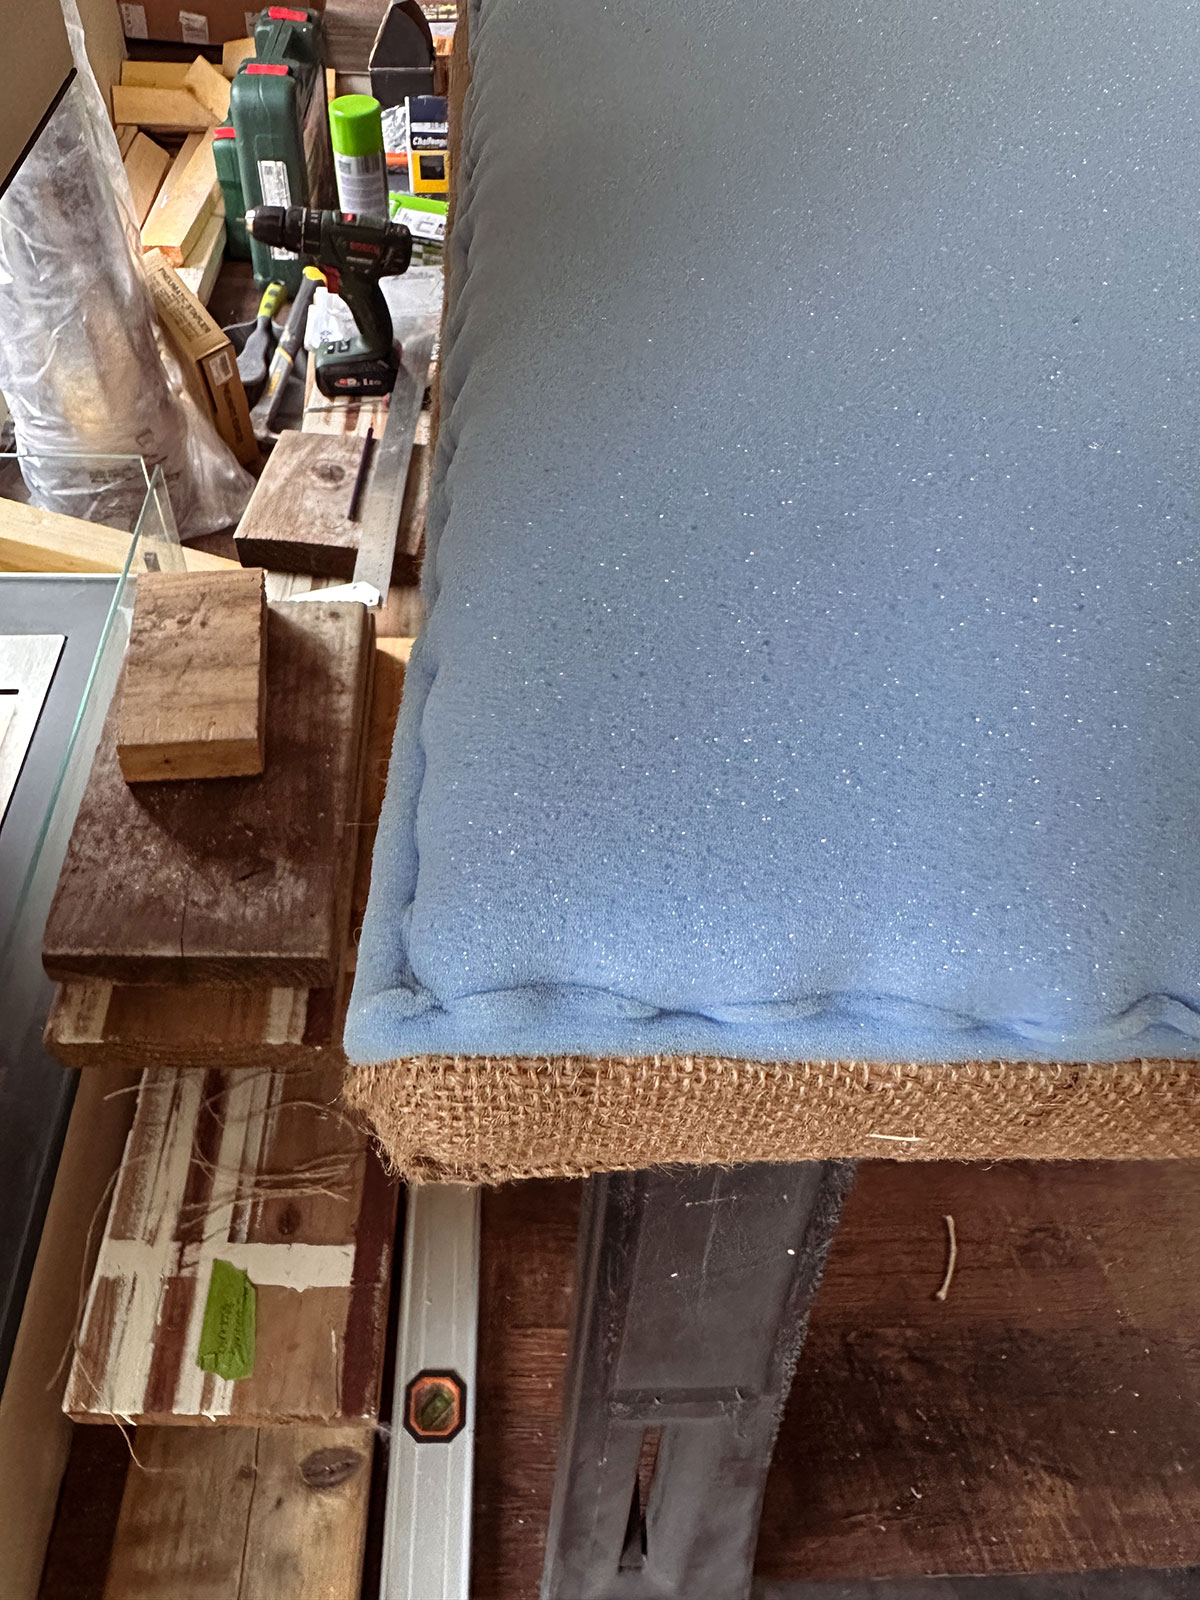
The front and side faces of the frame were covered in blue upholstery grade foam – spray glued and stapled in place. On the wall side of the frame, we opted only to cover the top of the timber as the true back would not be visible and we didn’t want to waste fabric for it to sit against a wall.
The first cut of the fabric was sooo nerve-wracking but once it covered the blue foam (many staples later), we had the very rough and ready beginnings of a sofa.
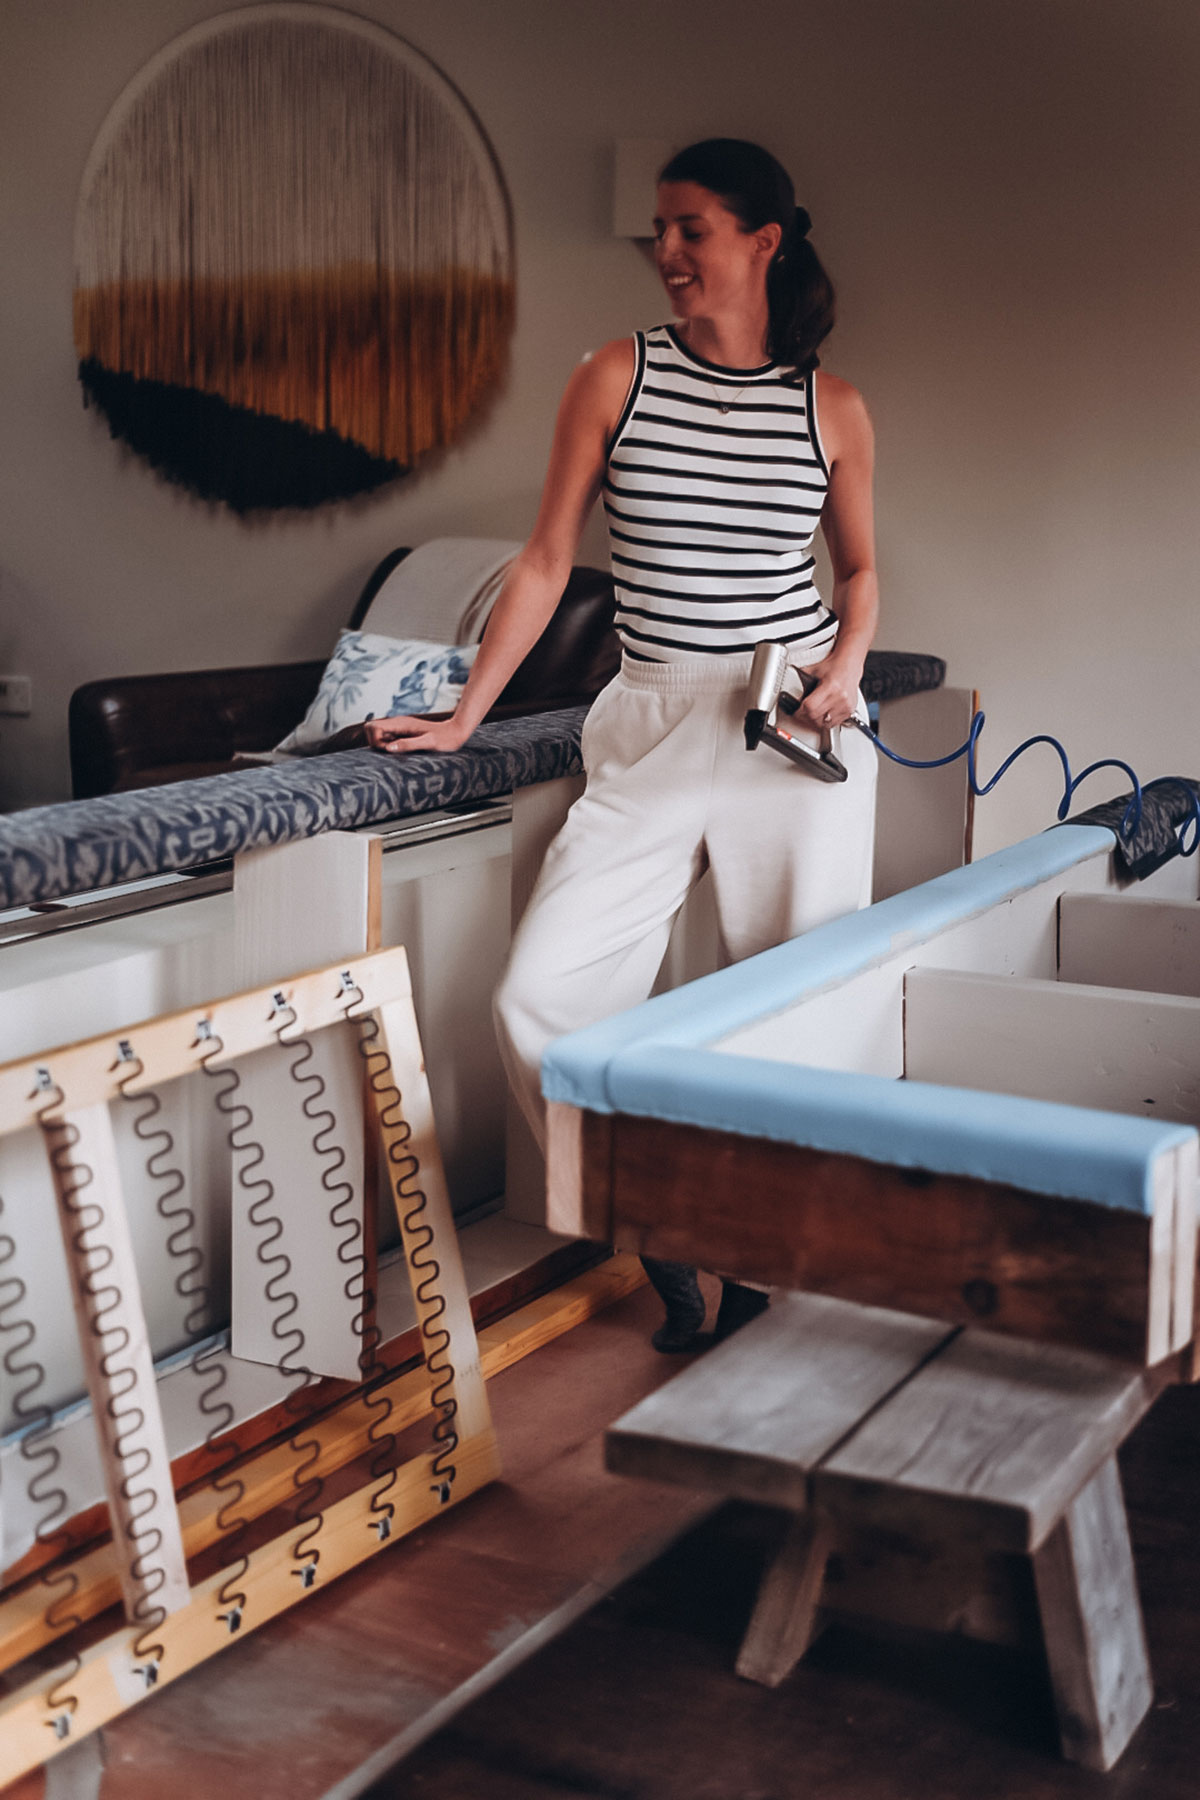
THE INTERNAL SPRUNG FRAME
Never one to shy away from a challenge, we chose to make the sprung element of the sofa removable so we could use the base as hidden storage and, although this caused some extra challenges, it does in fact now store all our spare bedding and towels as well as bio fuel for the fire.
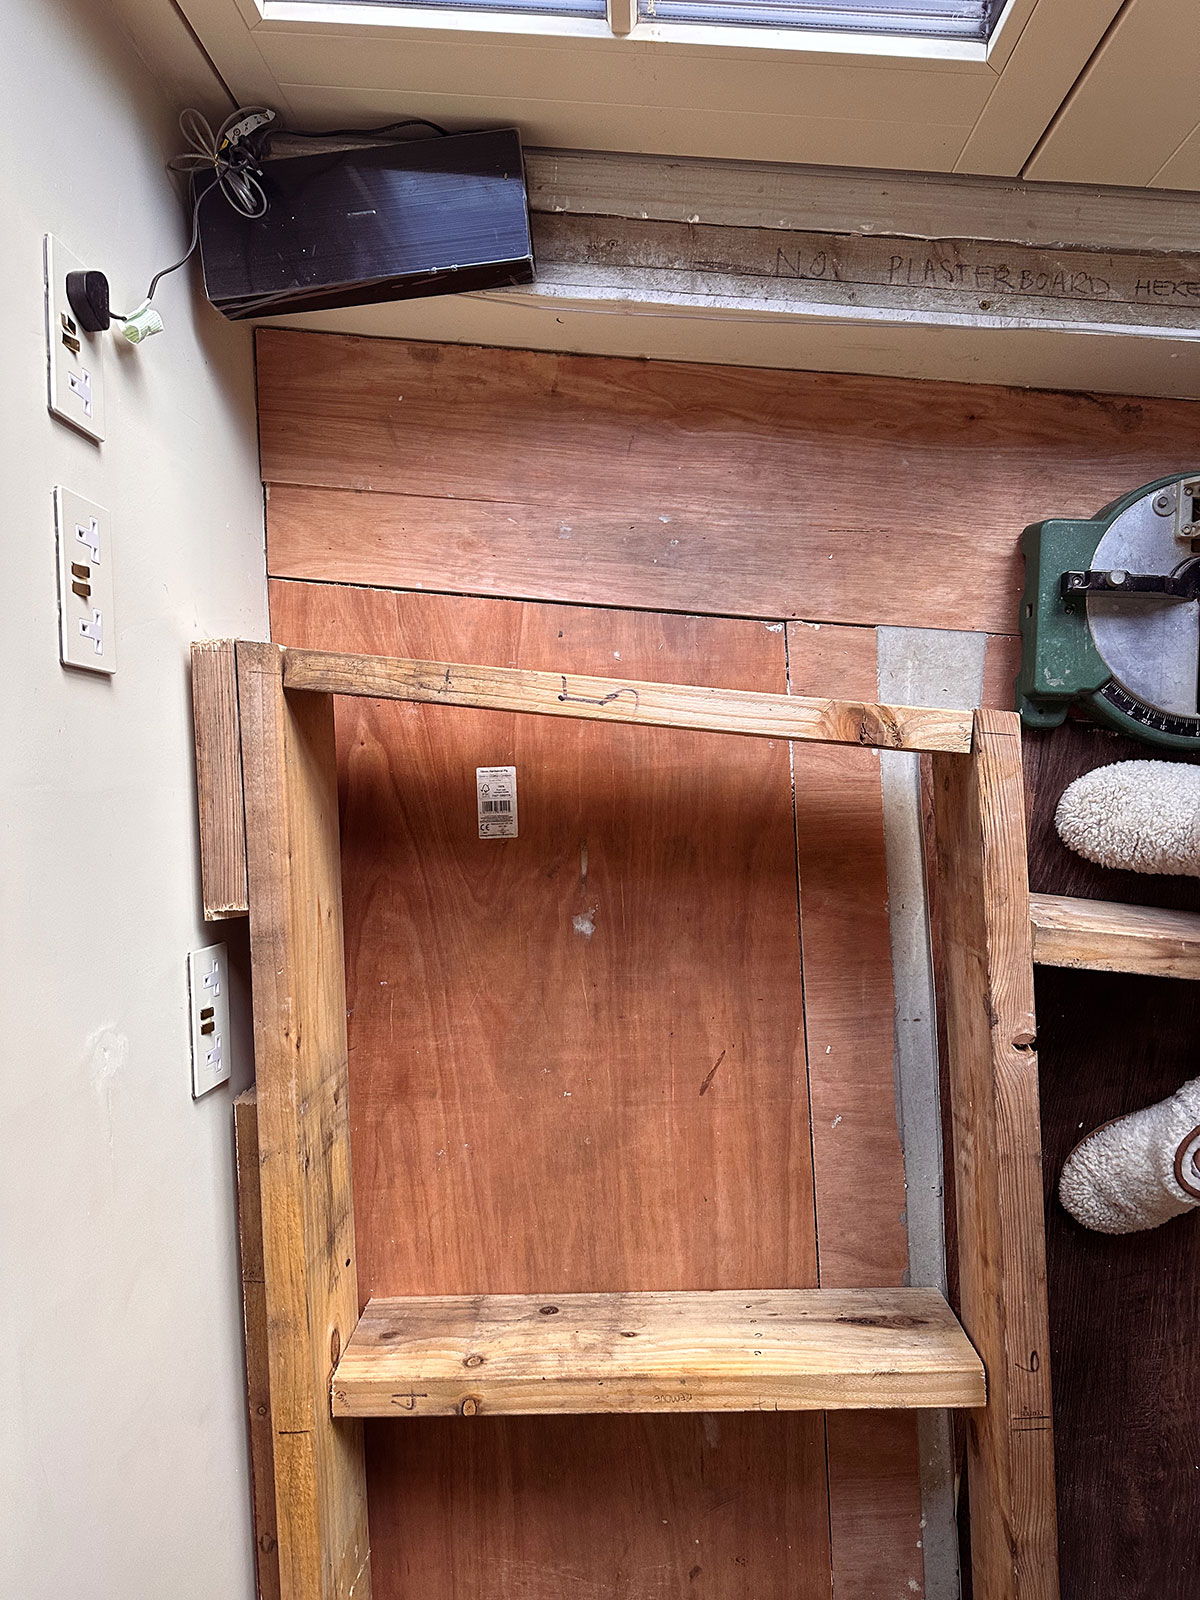
Having planned our eventual cushion sizes, we created internal frames from 2×4’s to match, building them to sit snugly within the outer frame, with cross bars and reinforced corners to prevent warping.
Having done a tonne of research, I landed on making a base with zigzag springs for ultimate comfort so I dutifully hammered those guys onto my frames and lashed them together with string to prevent any tangles down the road.
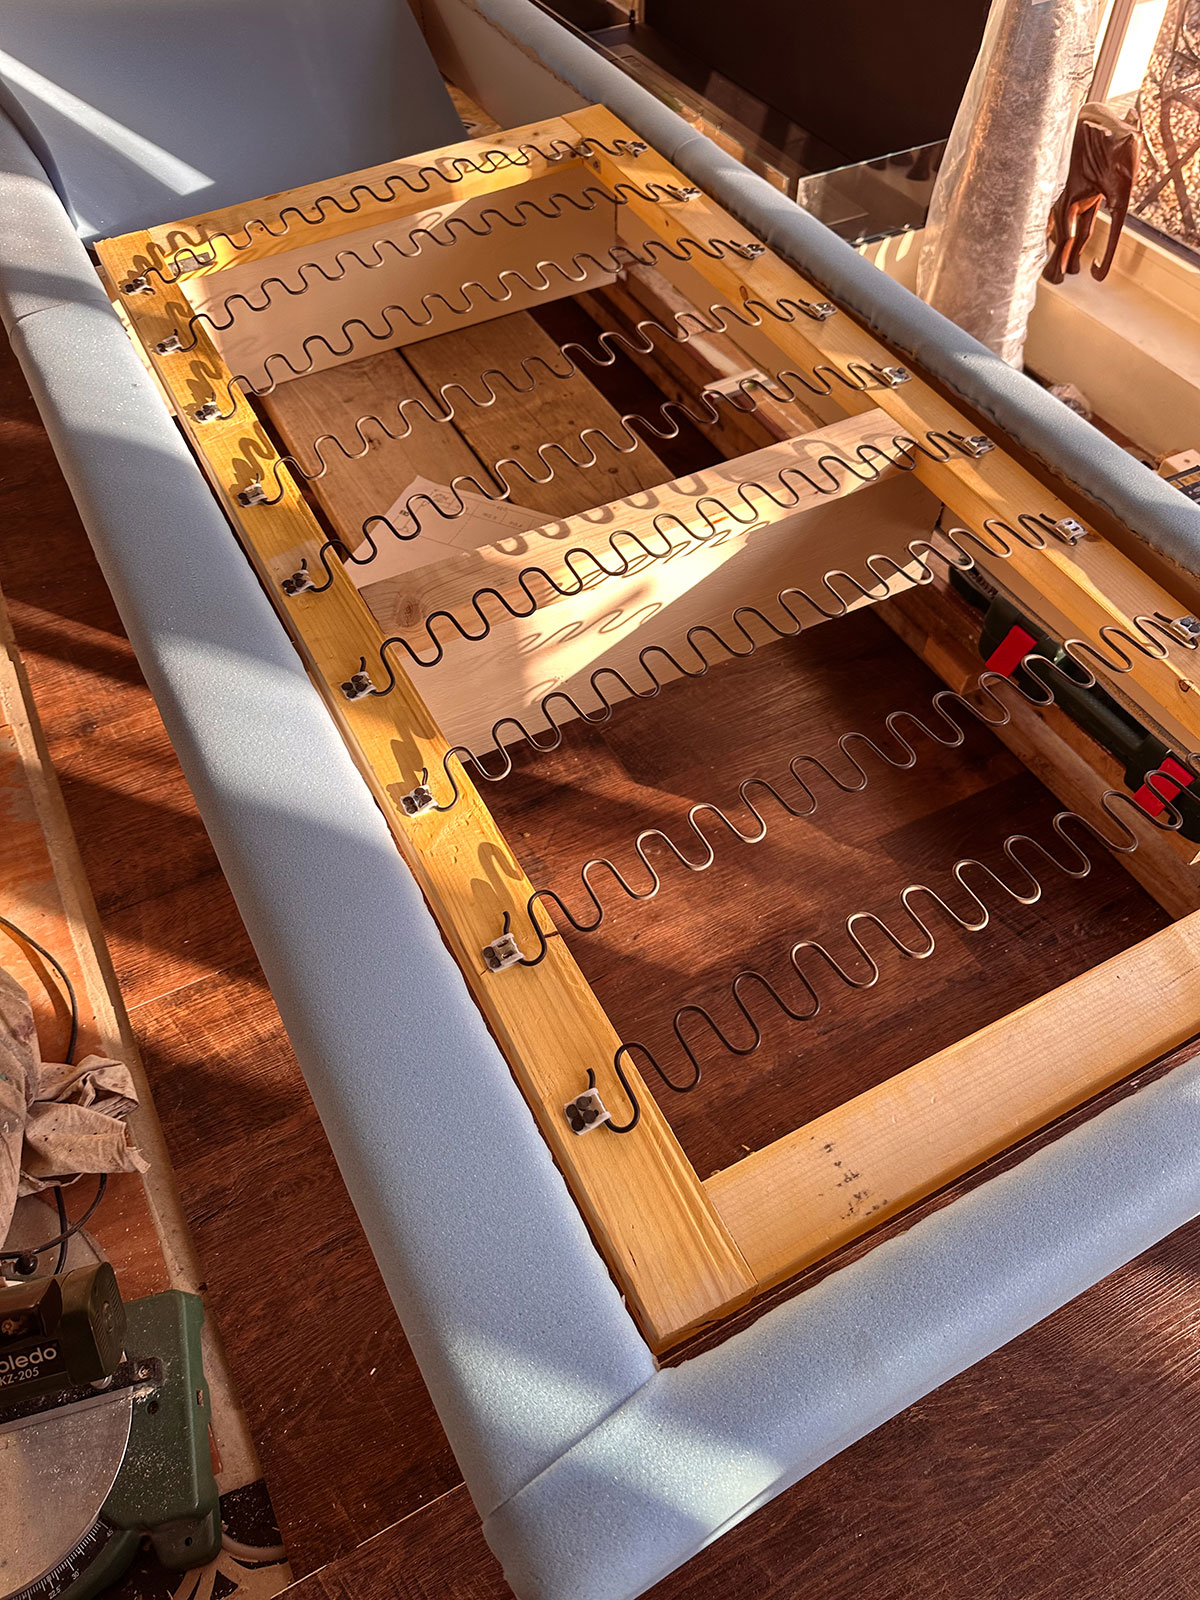
These internal frames are almost certainly over engineered but if you’re gonna do a job…
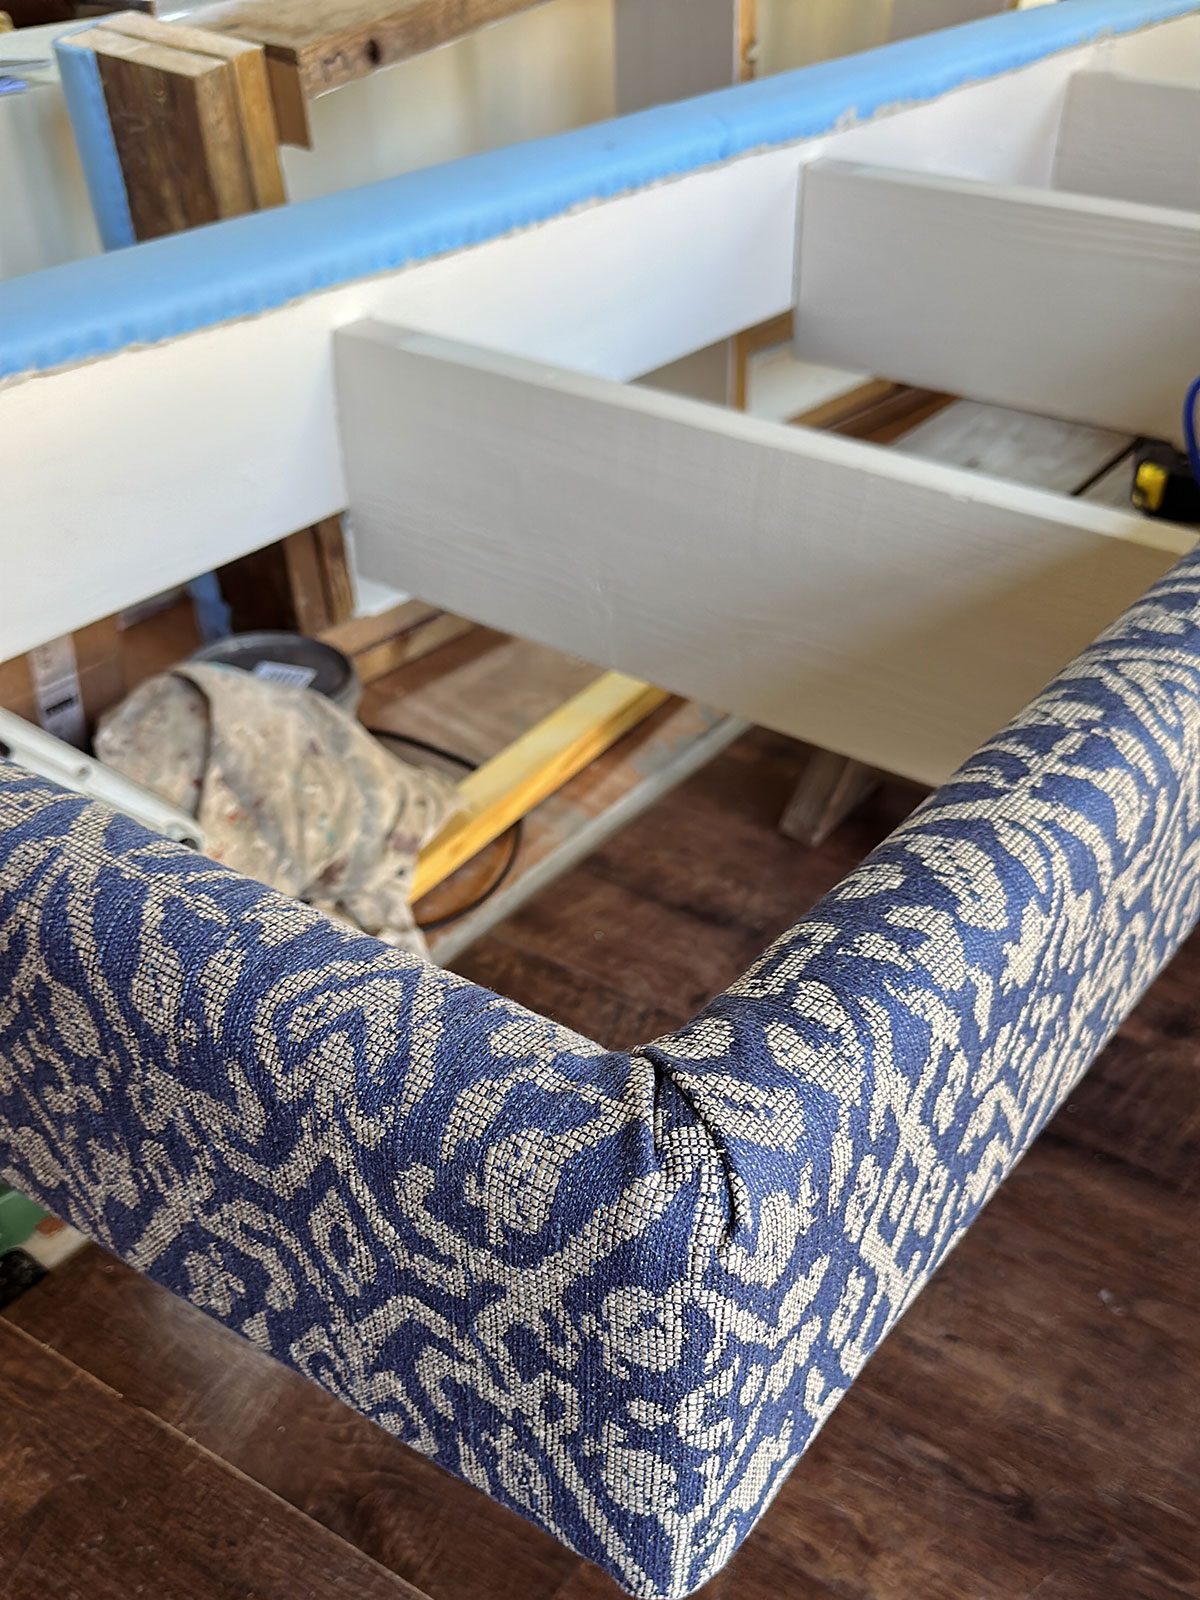
They were built up with the following layers : vented jute (to prevent foam fall out), blue foam, wadding and, lastly, the fabric. Although this would be absolutely correct for a chair or bench, I couldn’t help feeling it was a little unnecessary when a giant plush cushion was being added atop but in for a penny, in for a pound right?
One distinct advantage of all those layers is that the frame was well and truly hidden; in fact, she was finely dressed and I was feeling rather chuffed with my efforts once all the internal frames were in place.
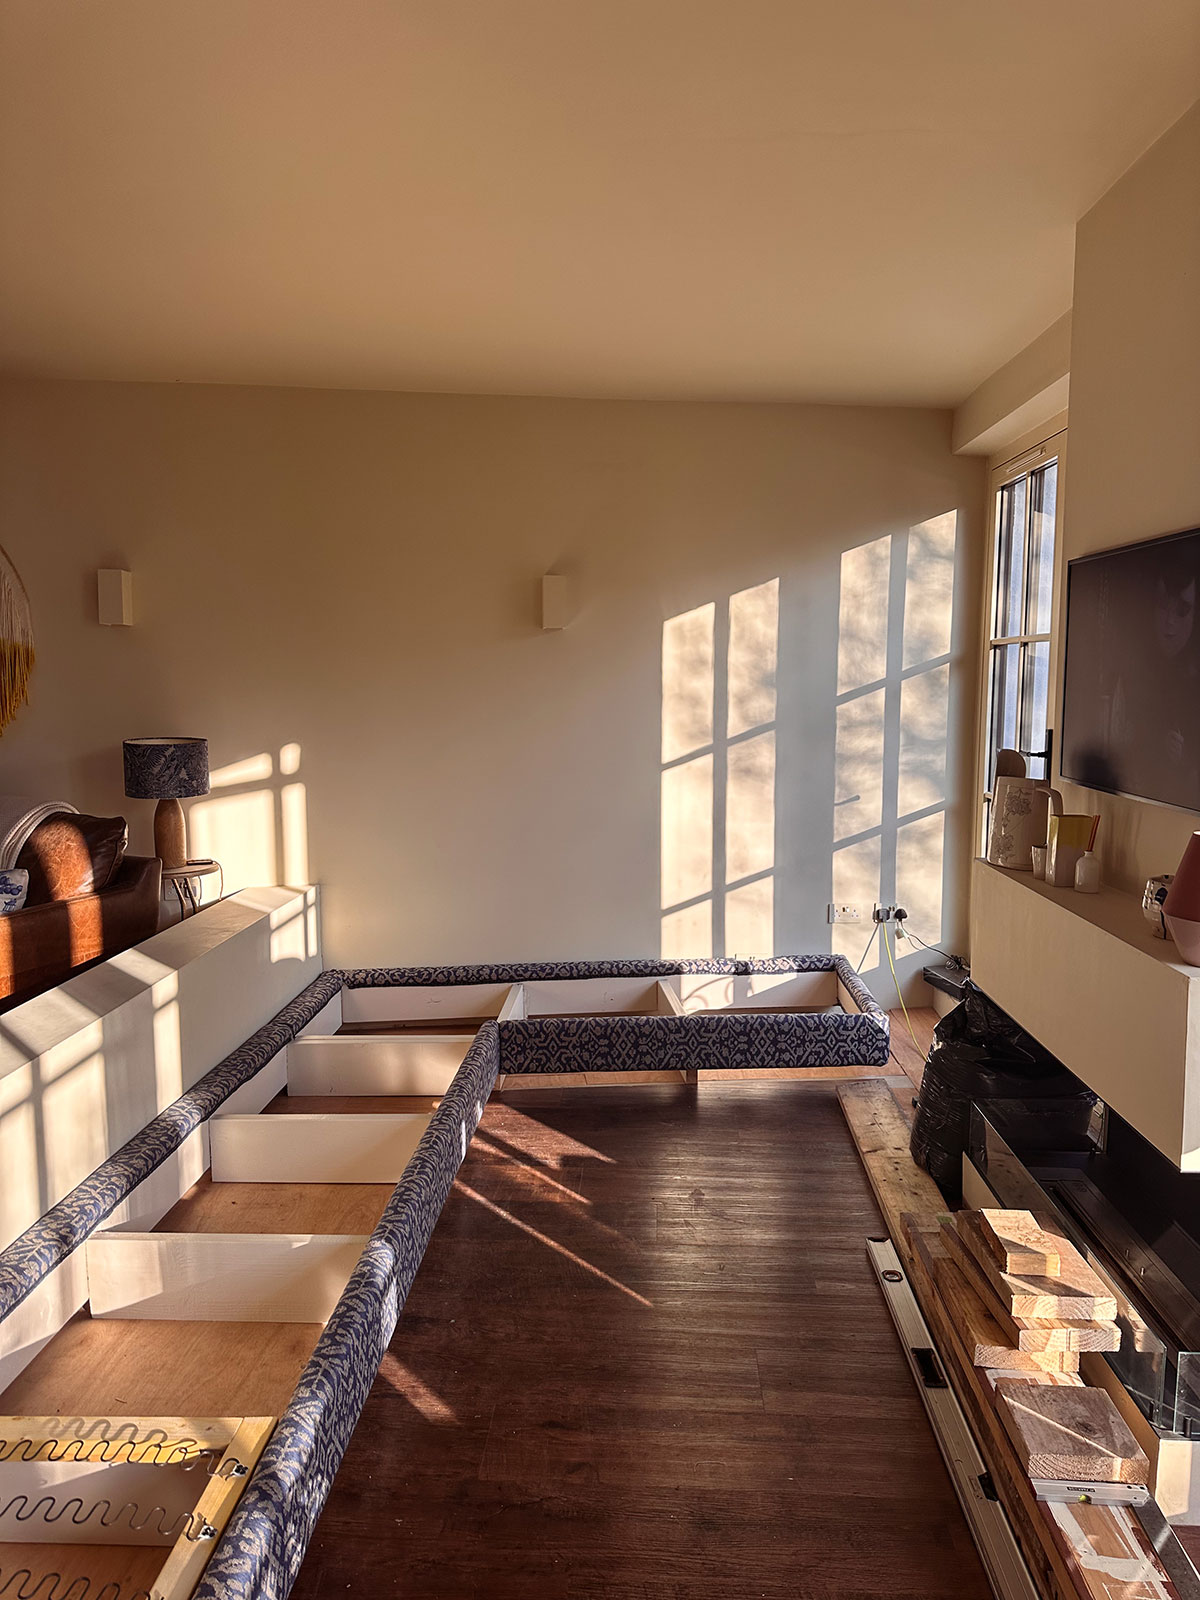
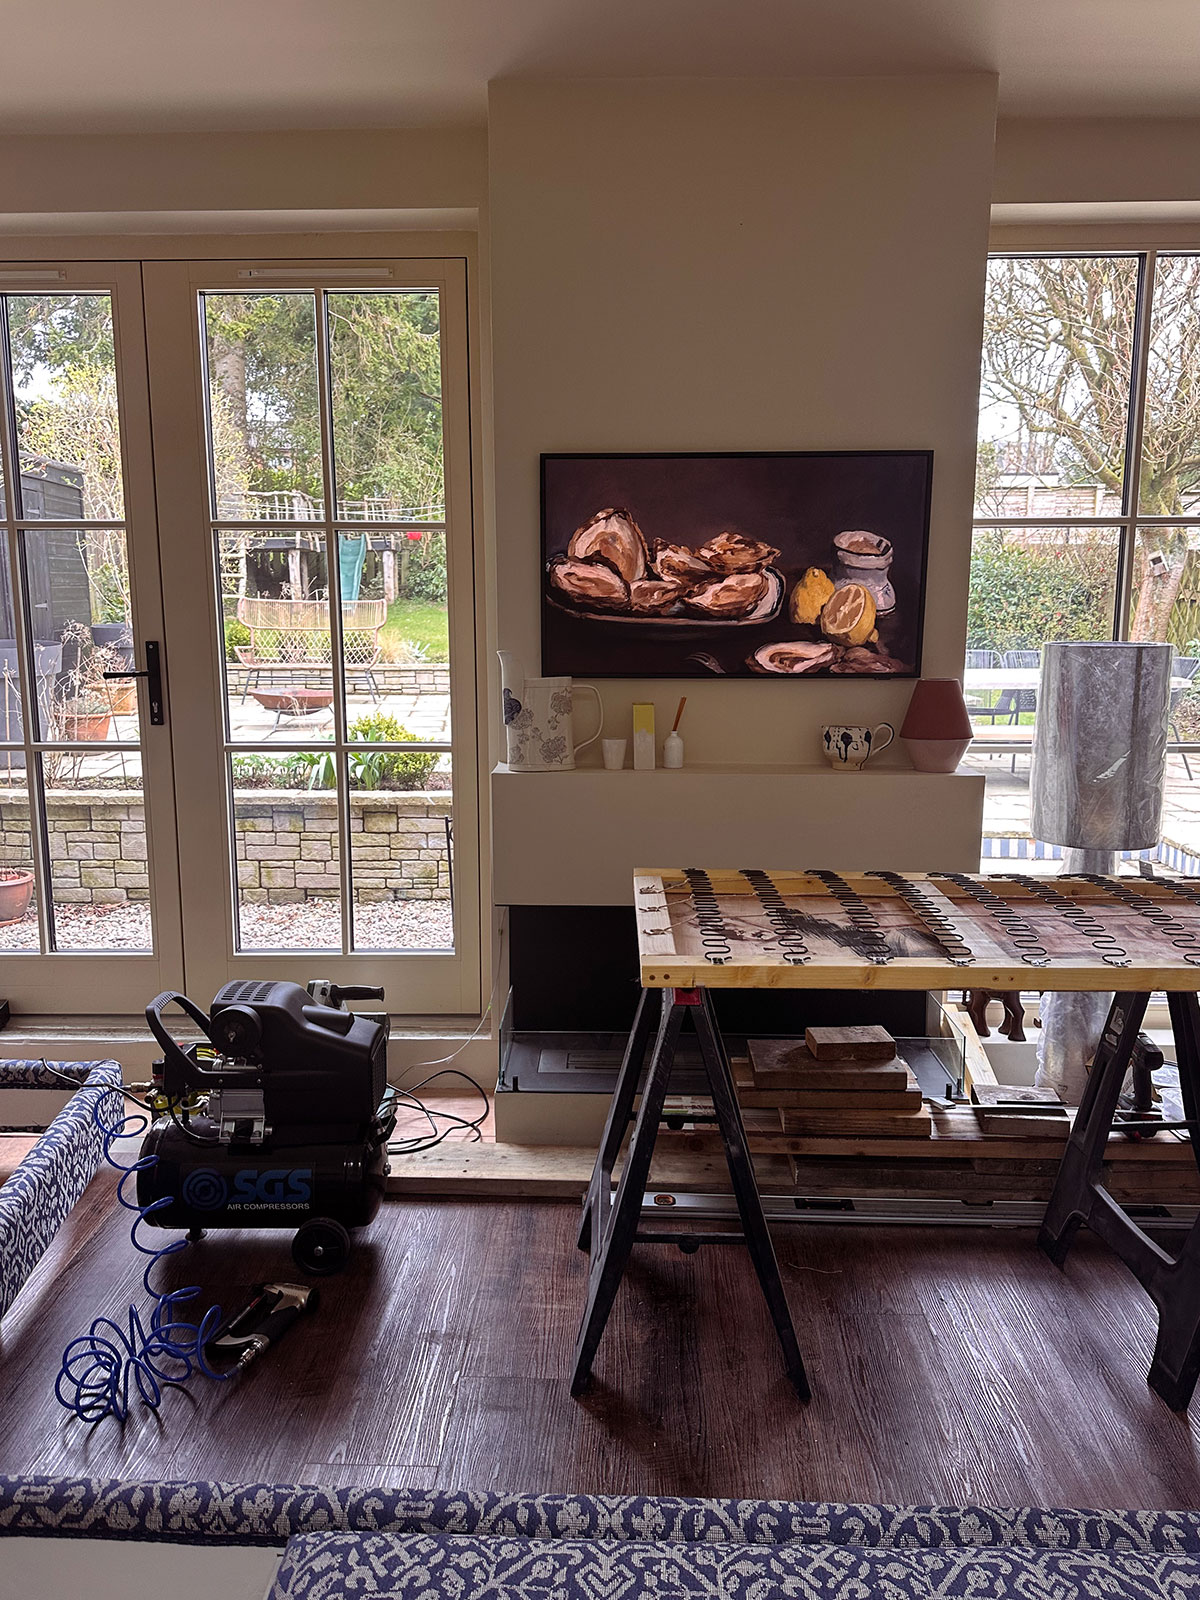
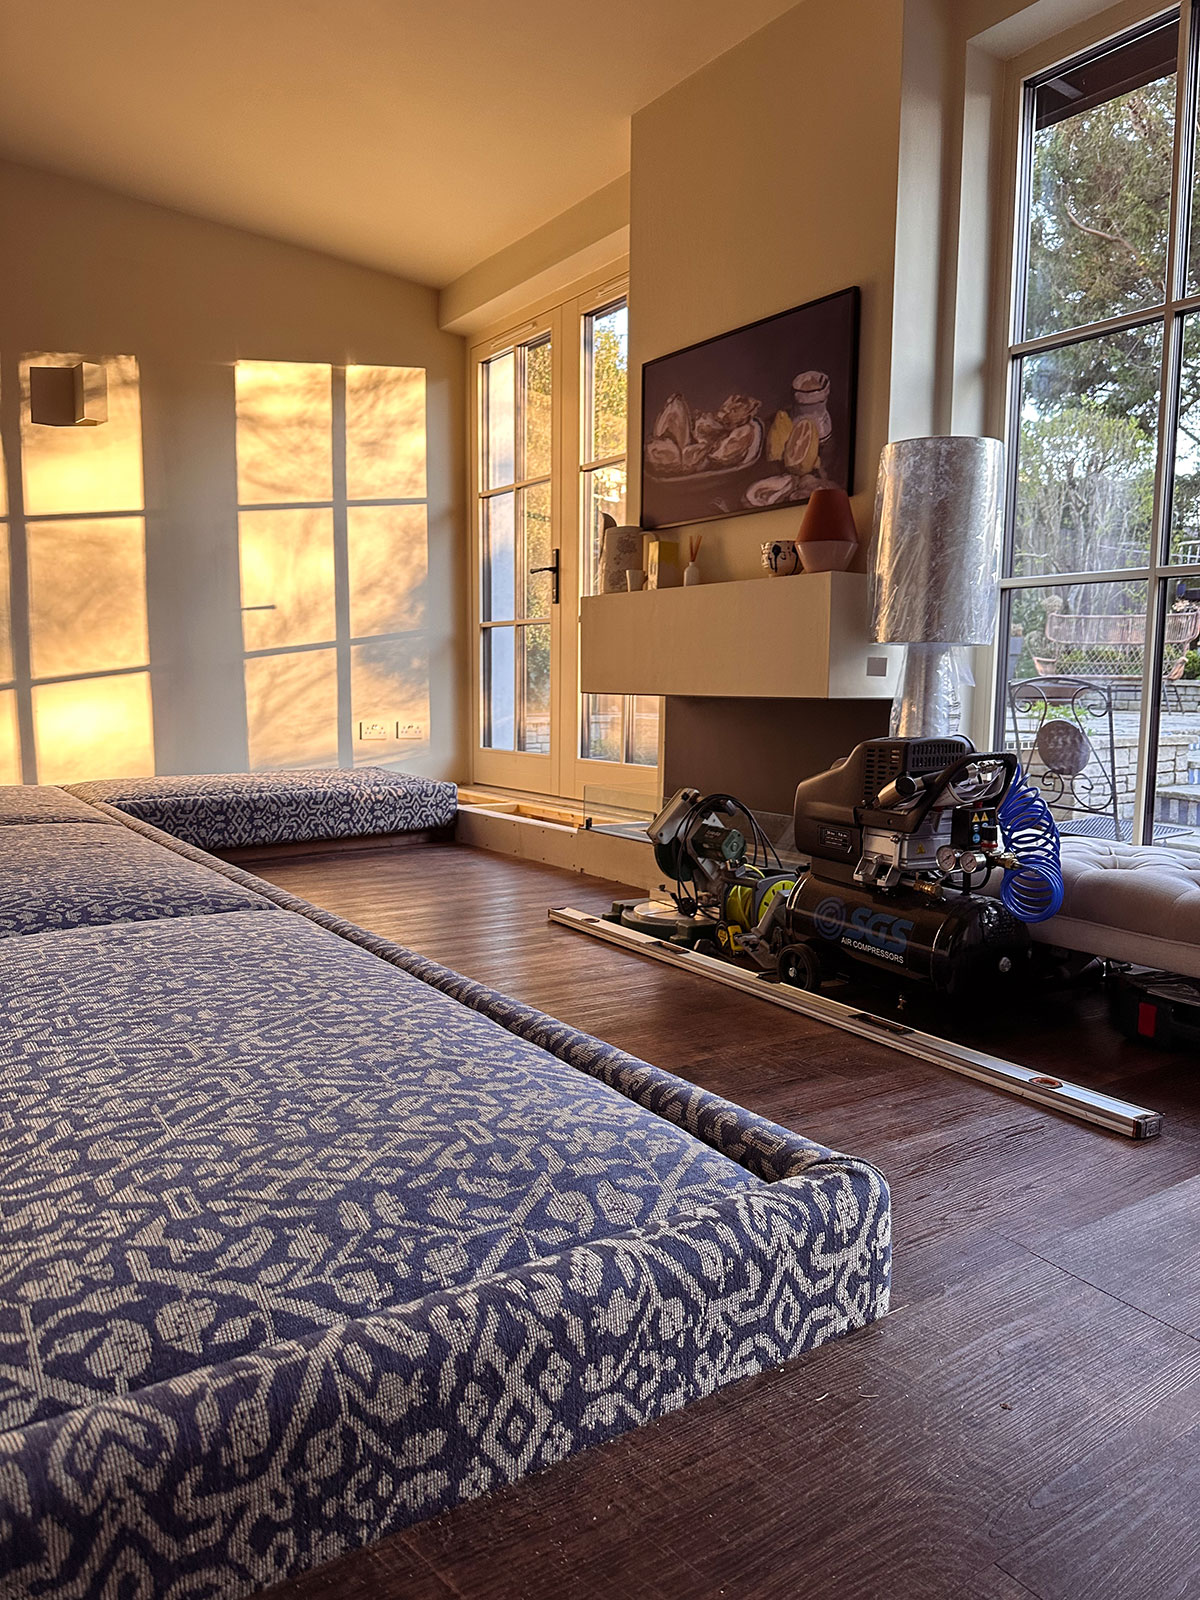
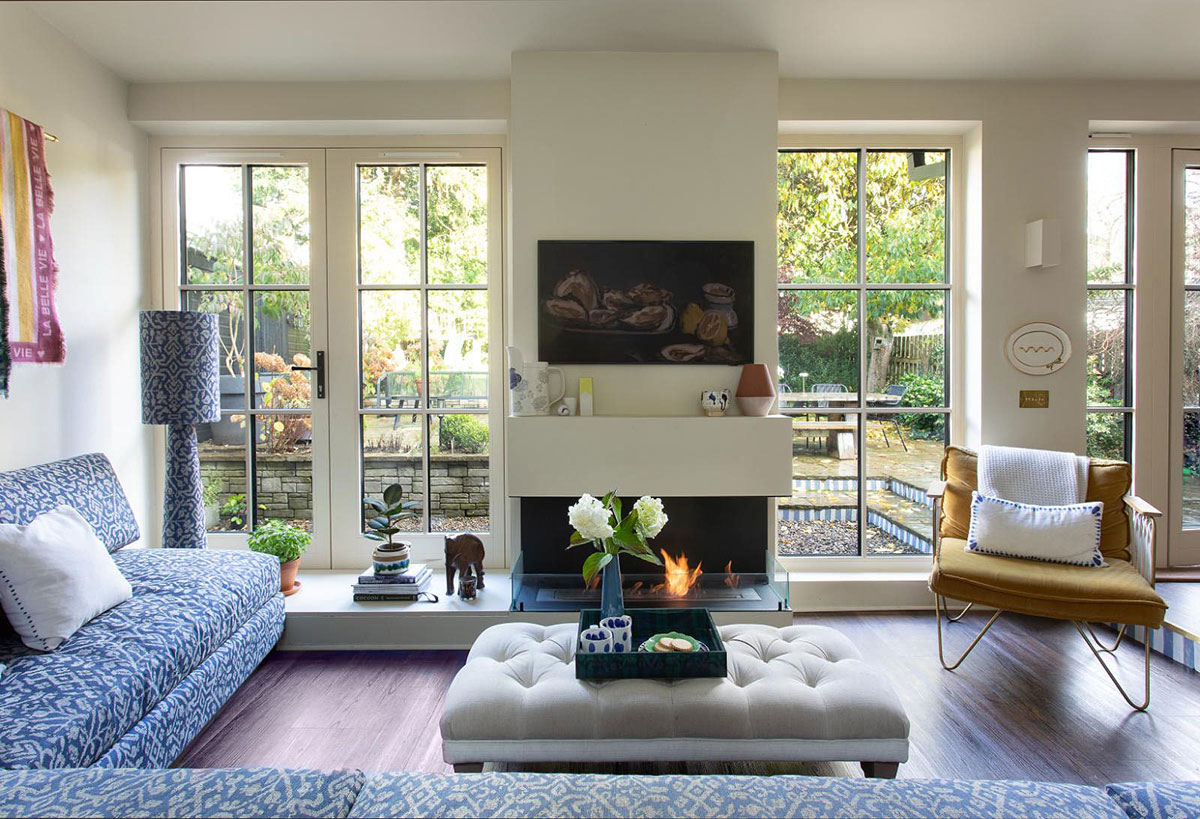
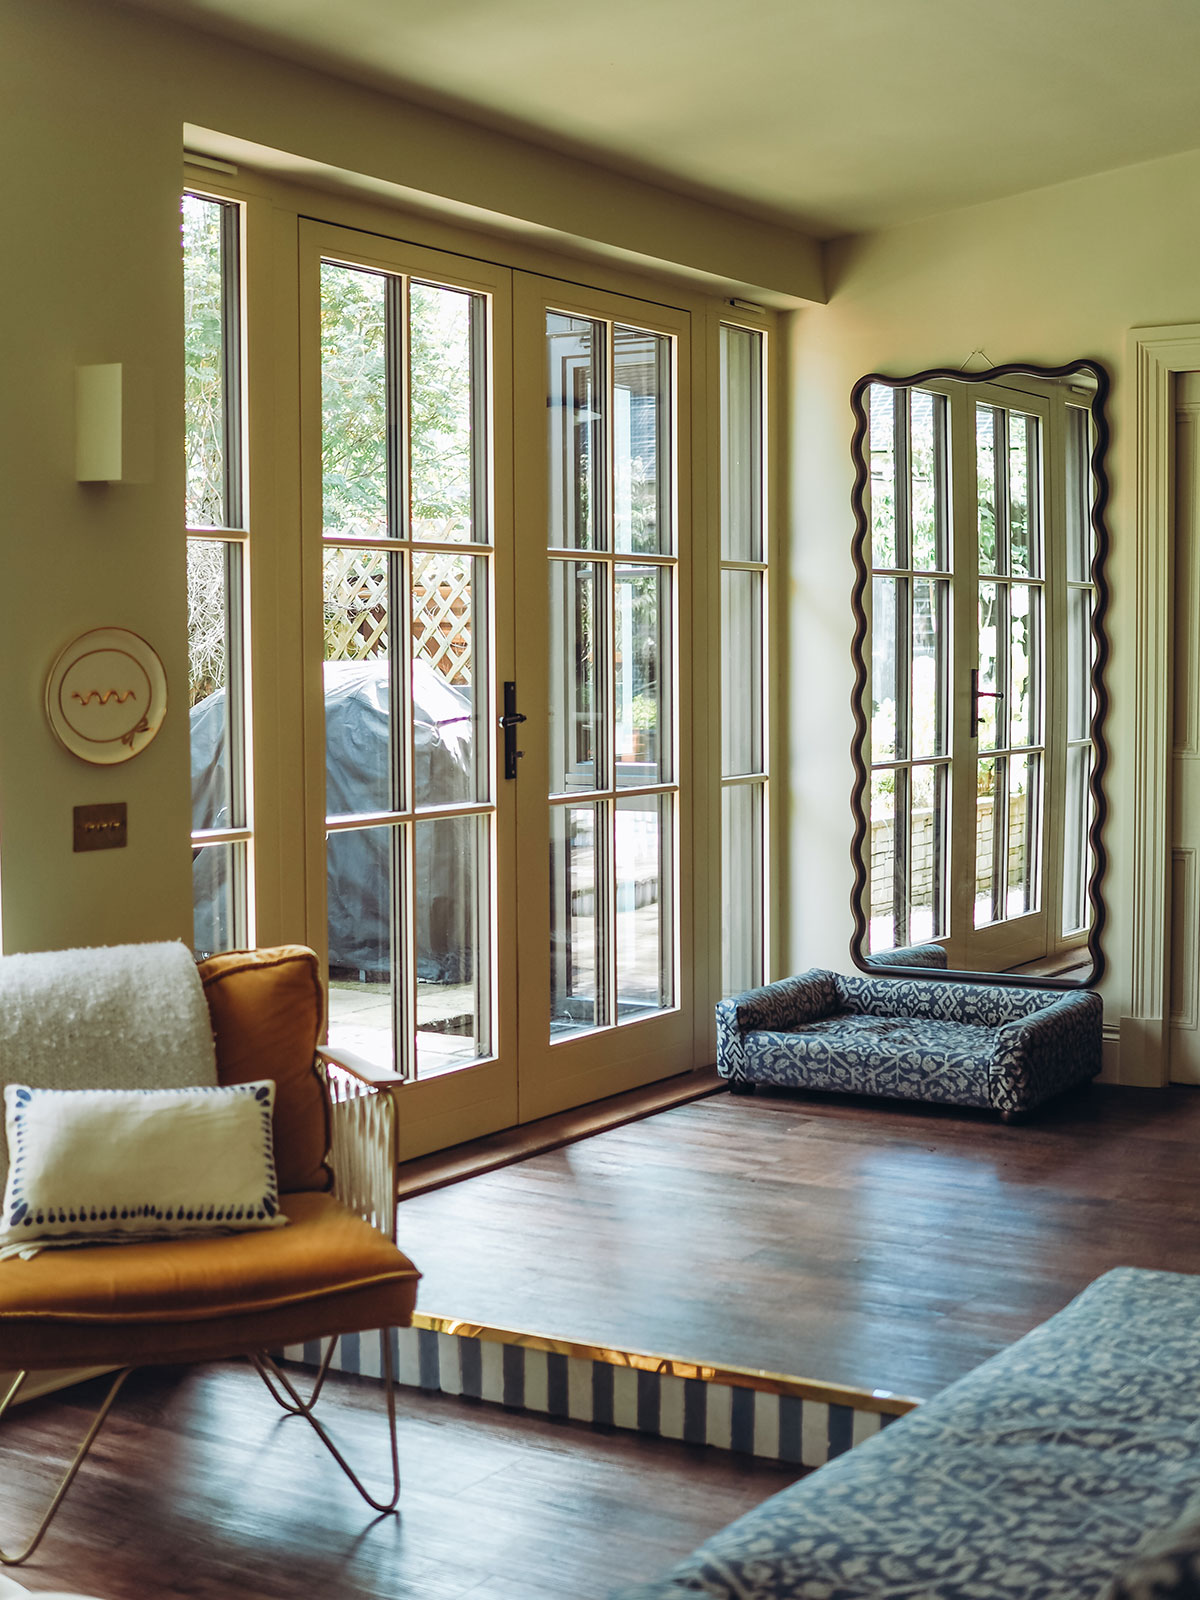
We added the kick-boards which my father-in-law stained the same shade as the floor and ordered the cushions… by far the biggest investment – you better believe I measured again and again and again.
THE ACCESSORIES
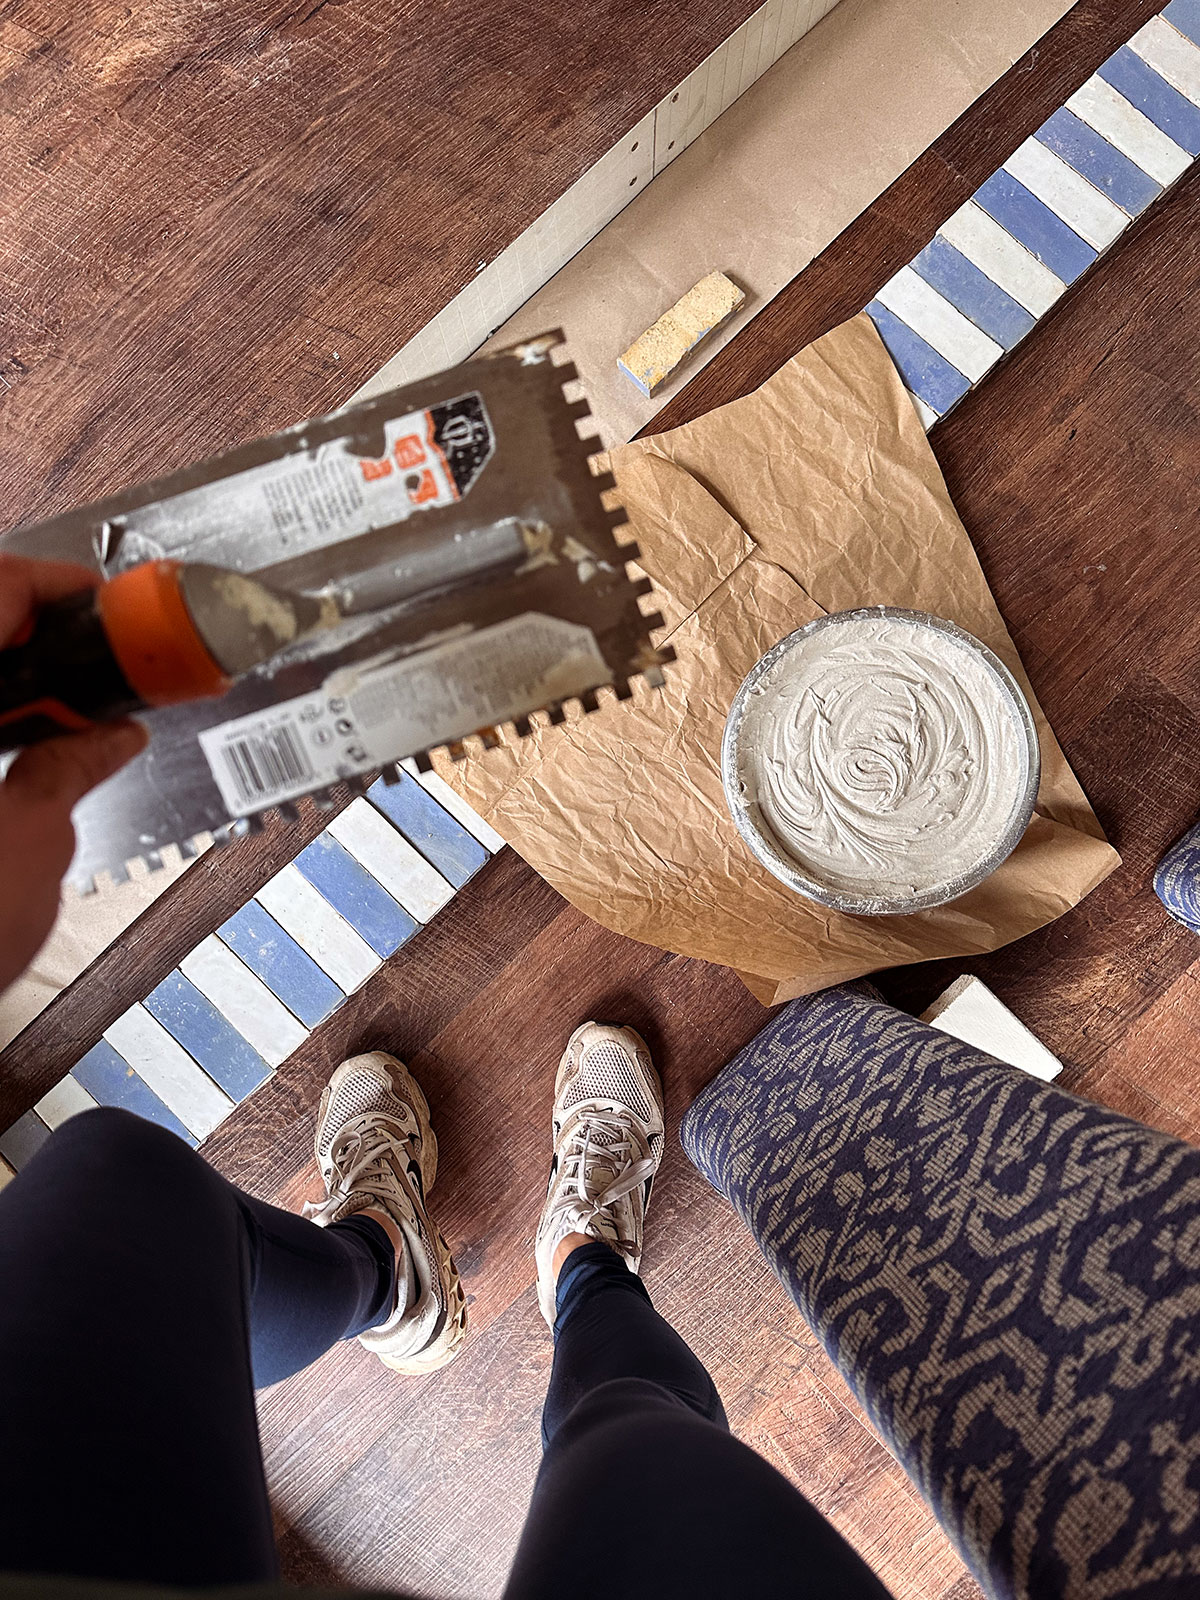
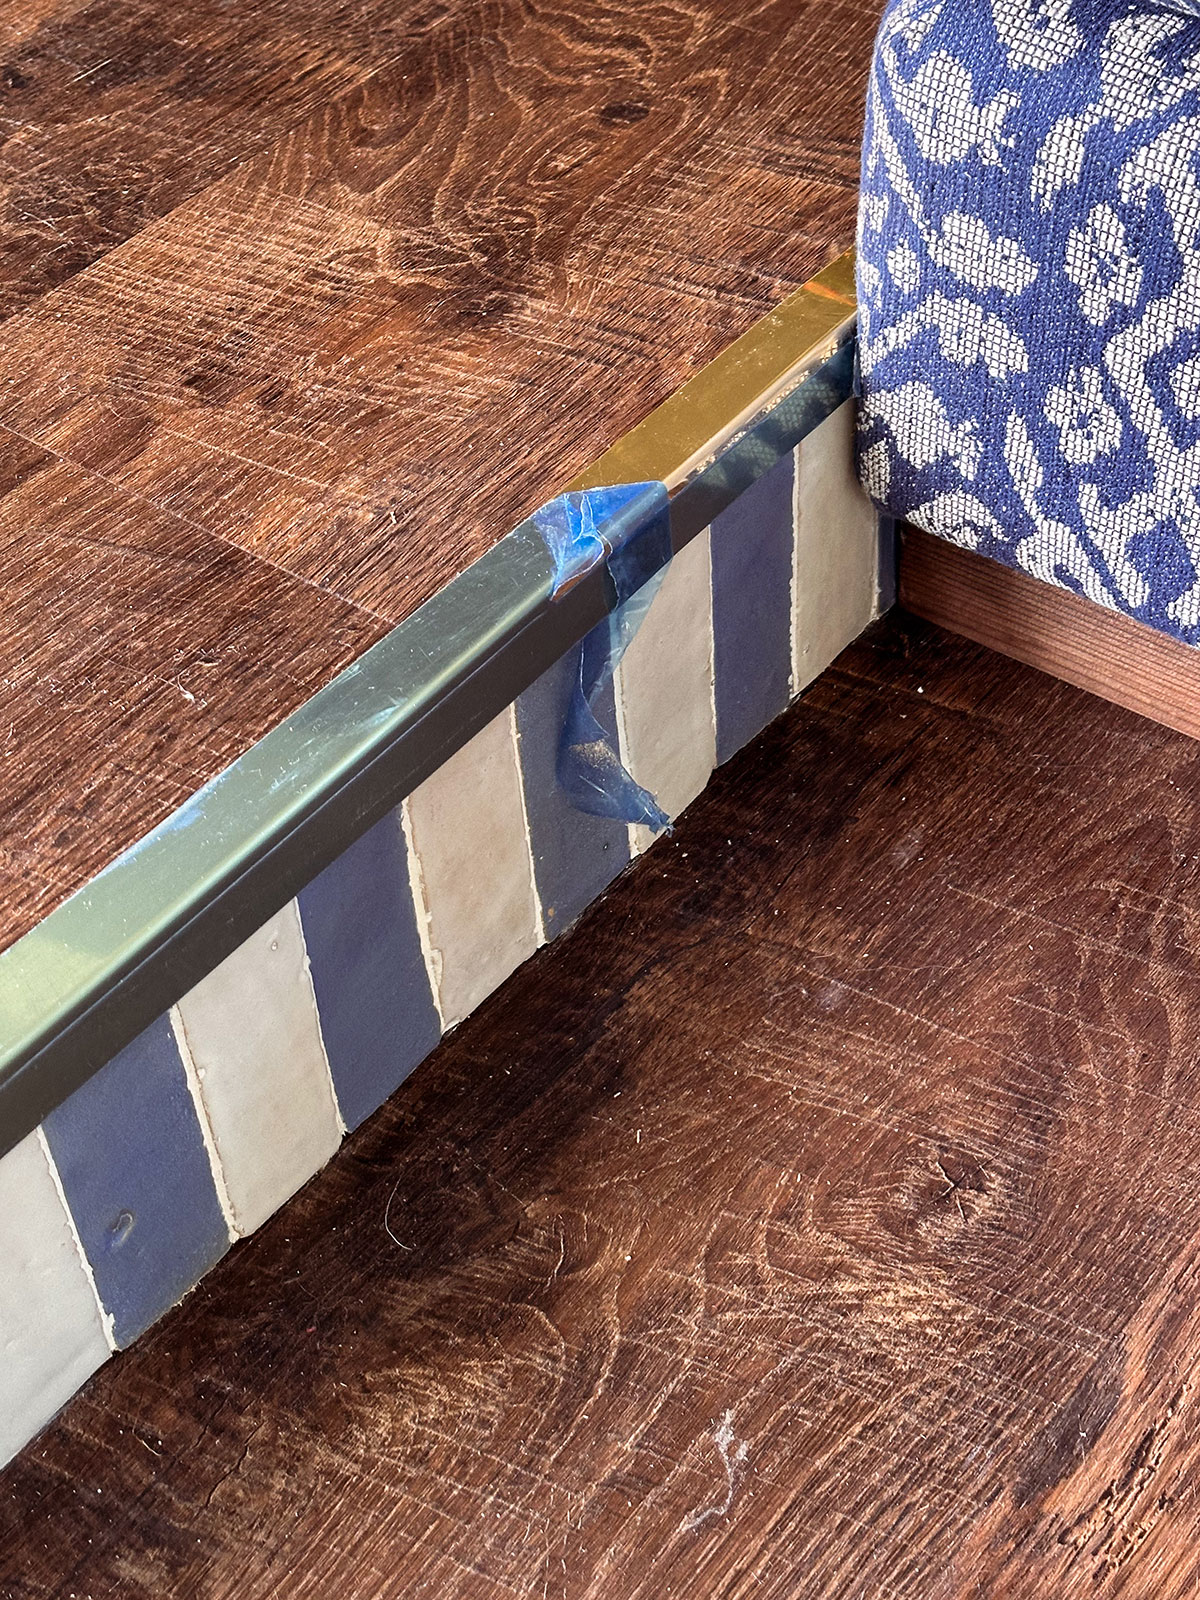
In the (tense) waiting period, I busied myself with building in the small area left of the fire and tiling the step riser with bejmat tiles left over from another project.
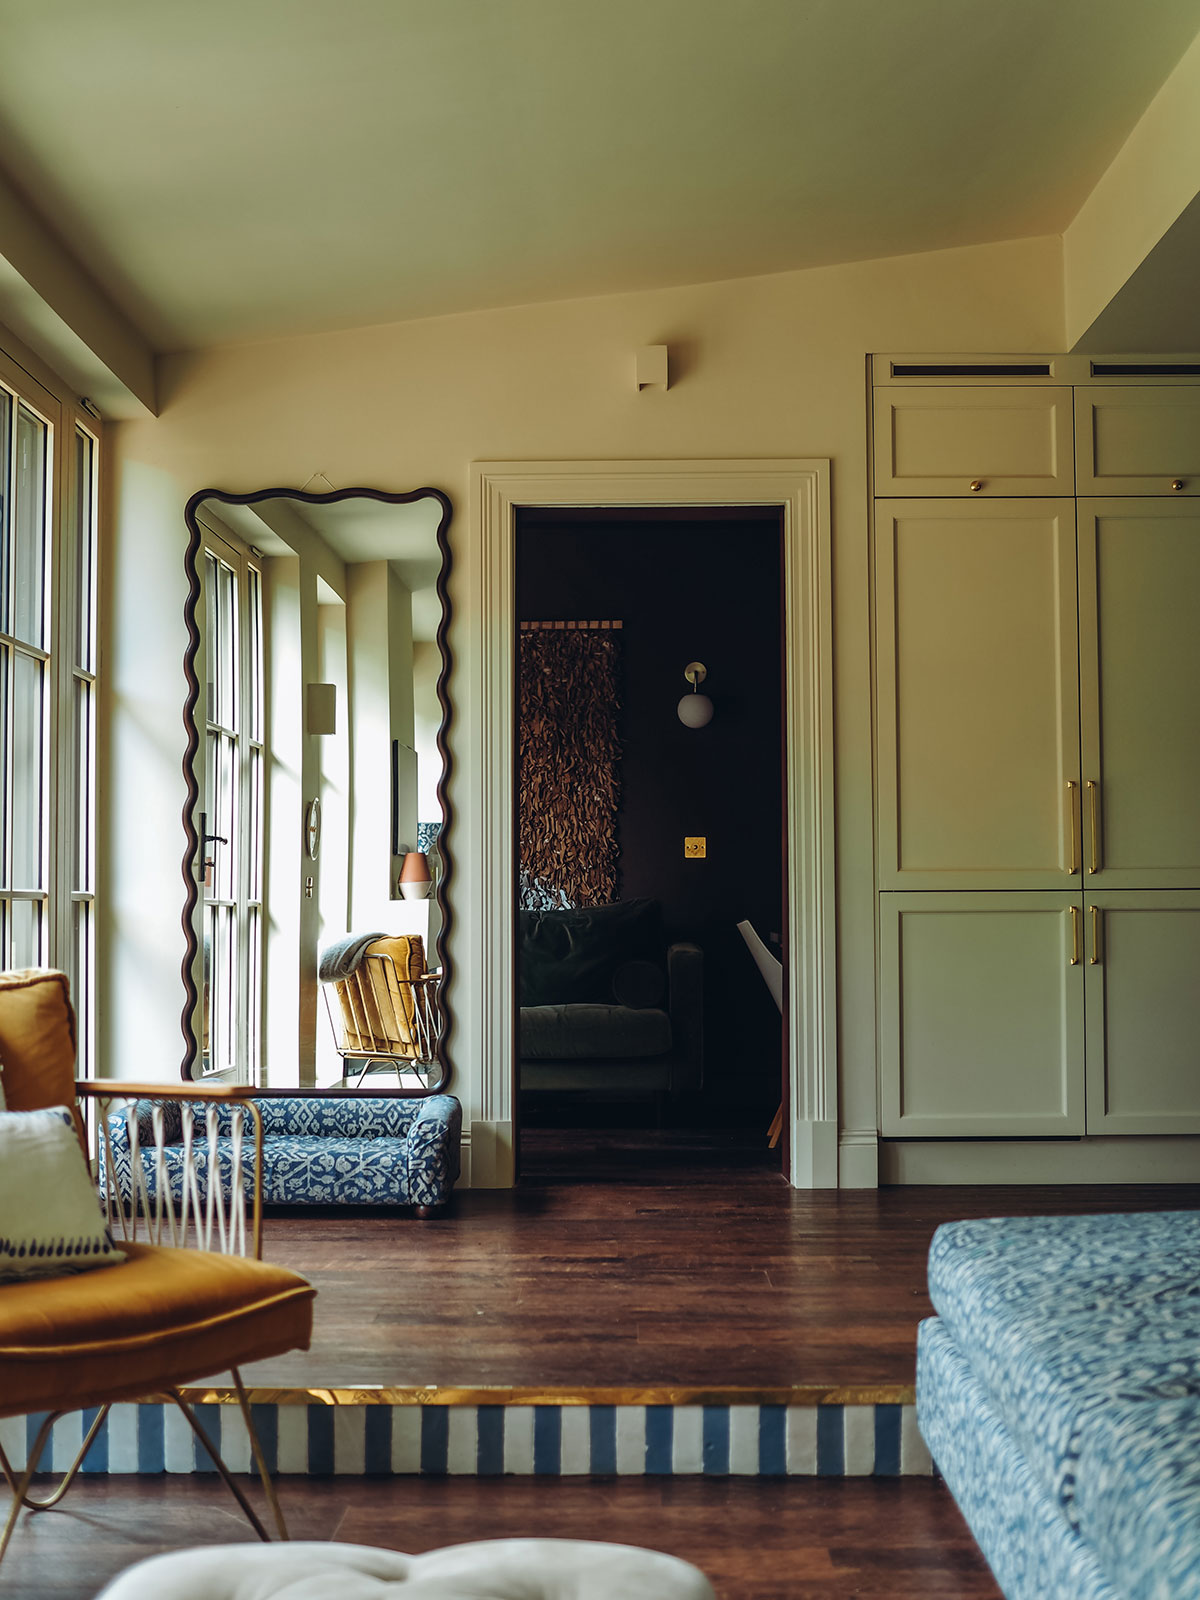
I also made a matching lamp and, because I truly couldn’t help myself, a matching dog bed.
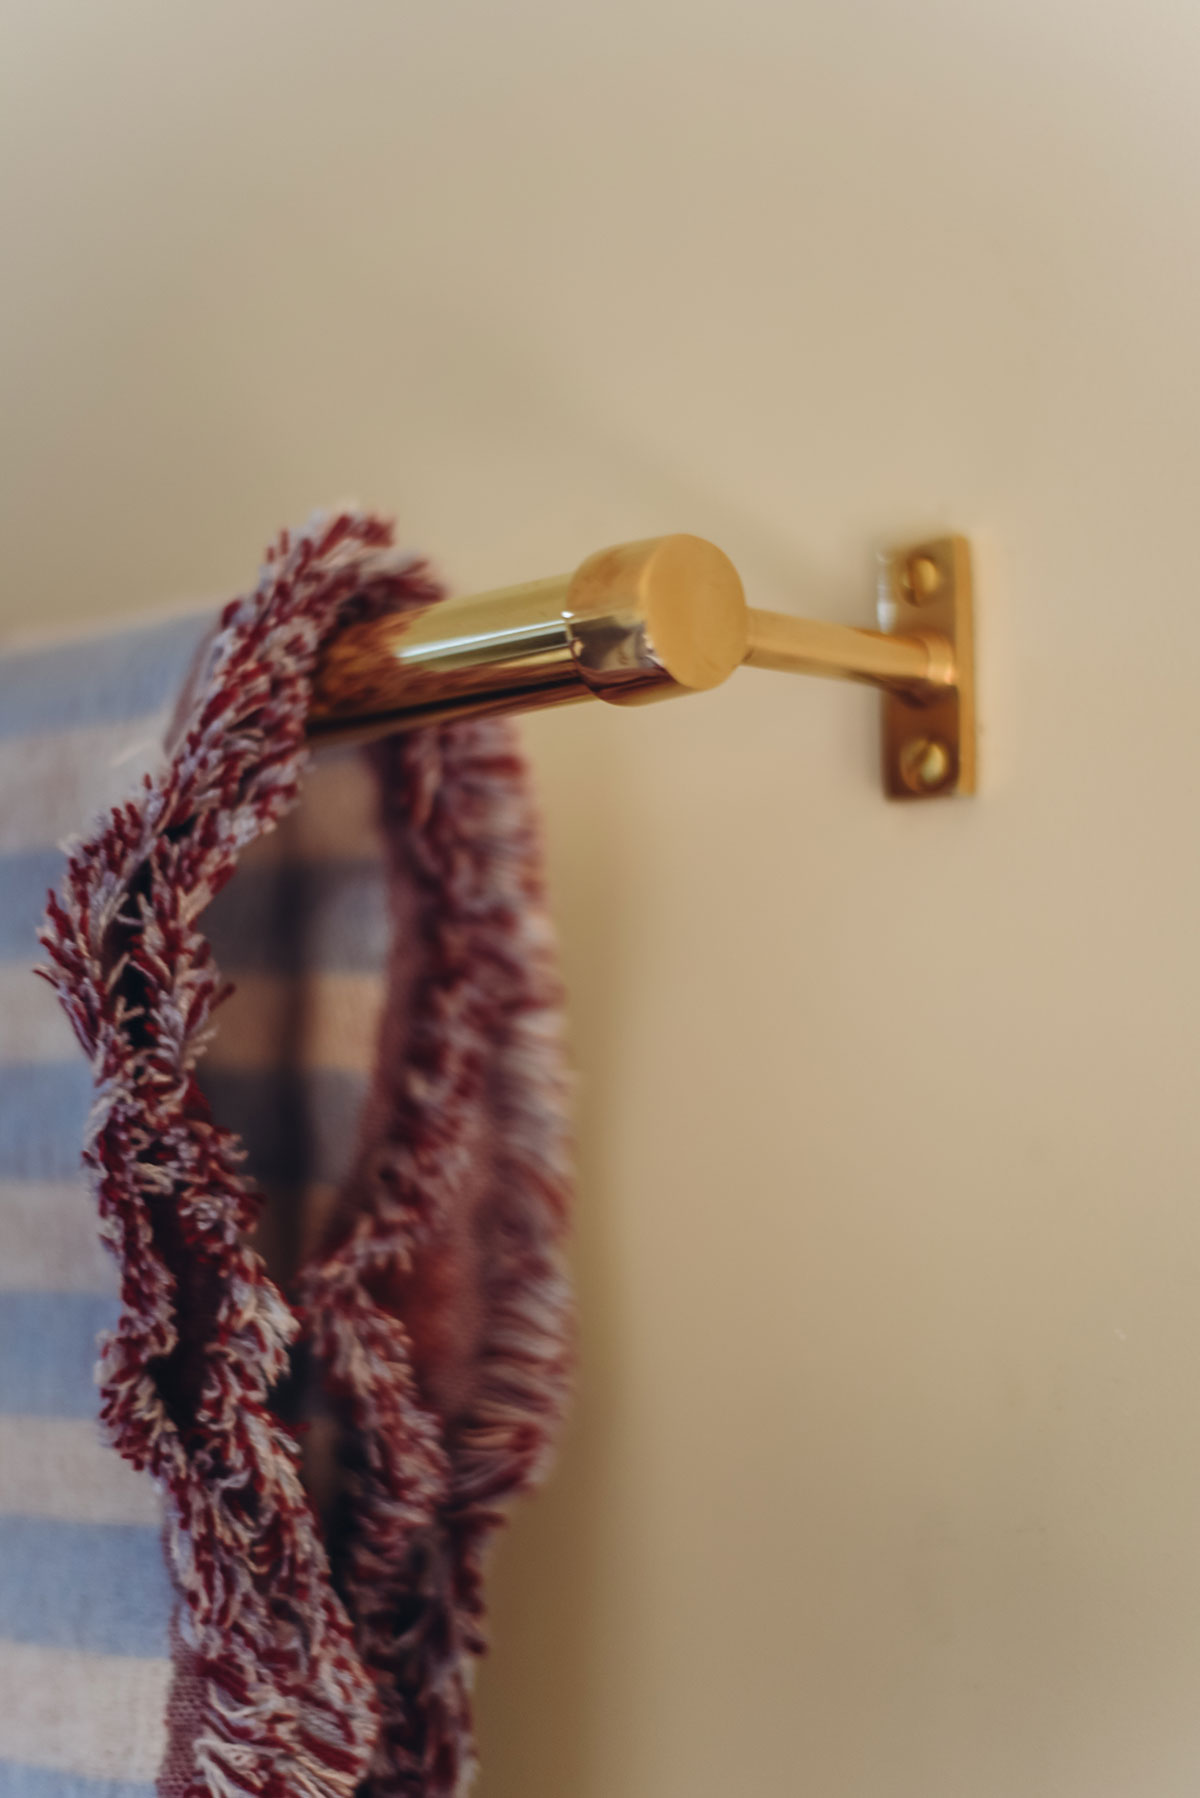
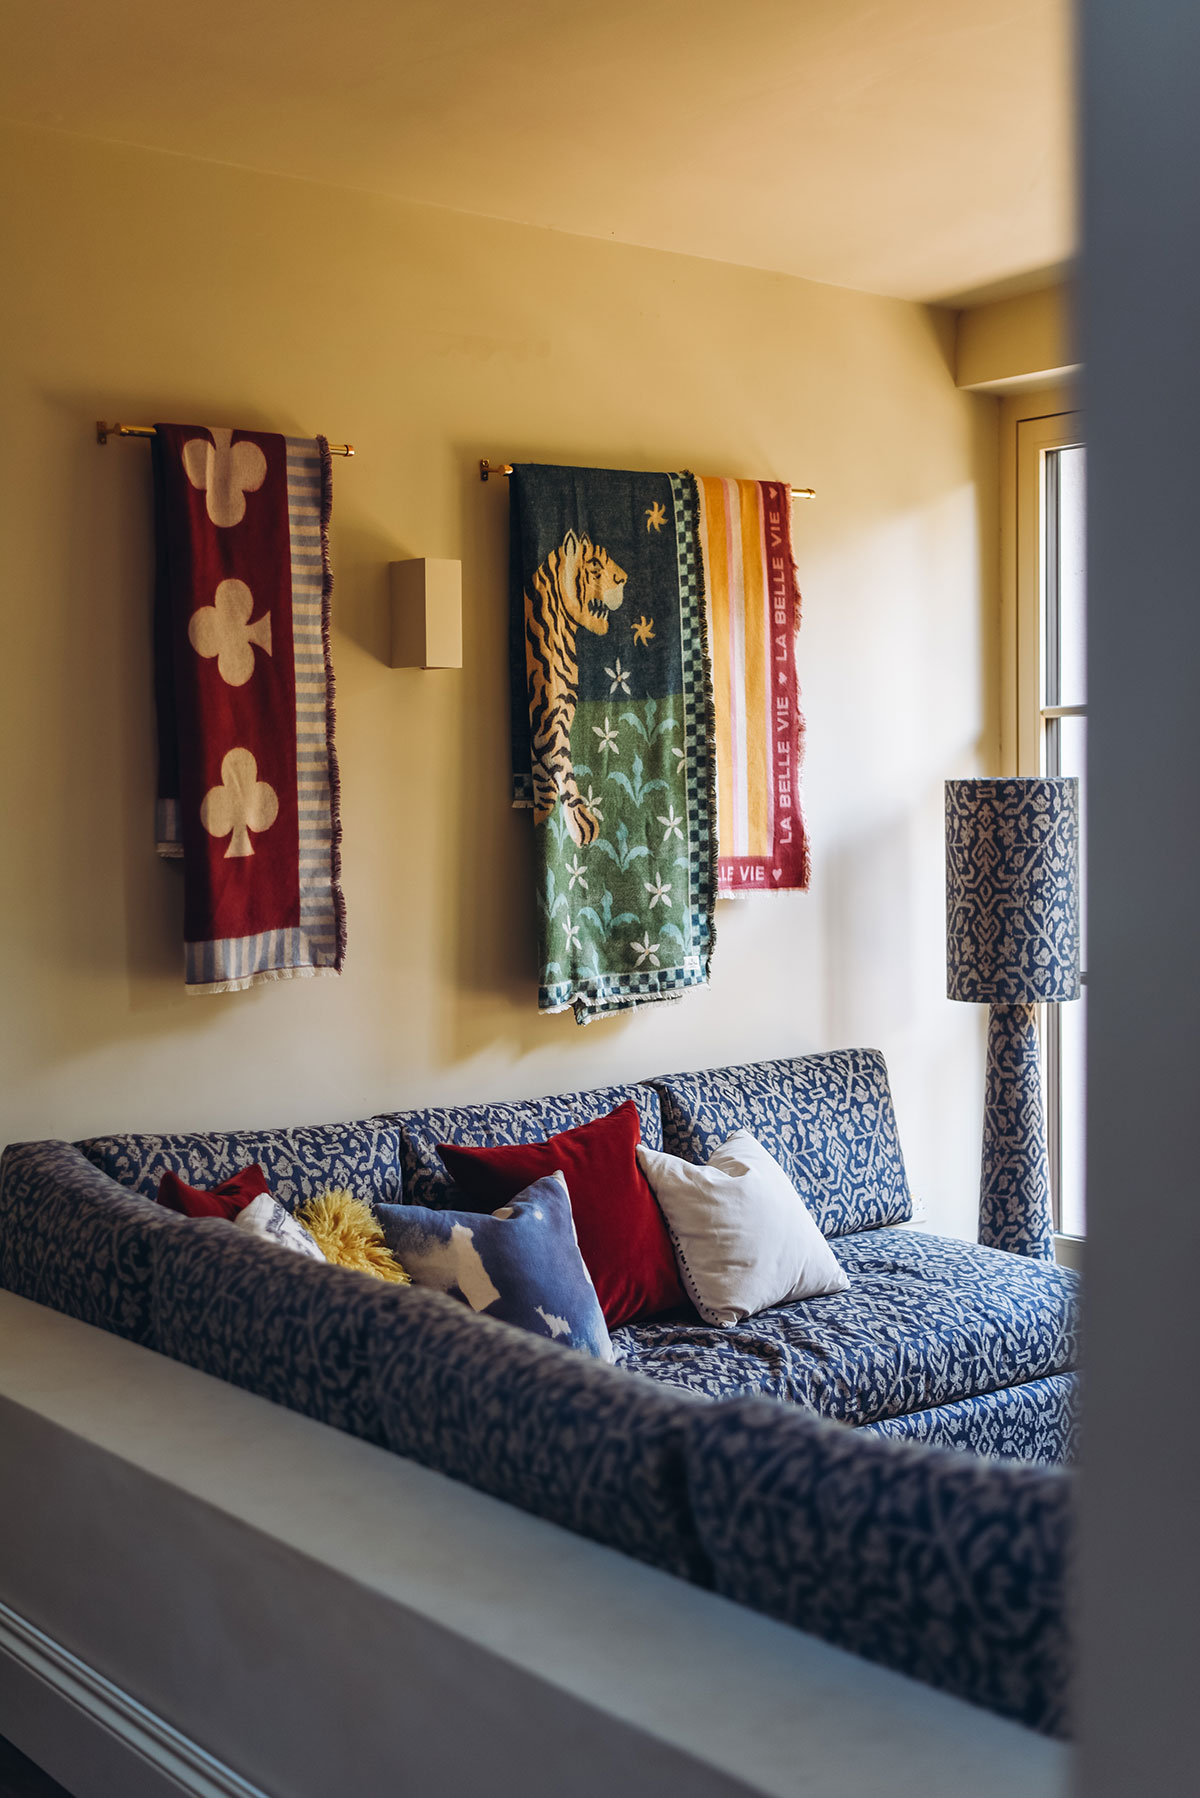
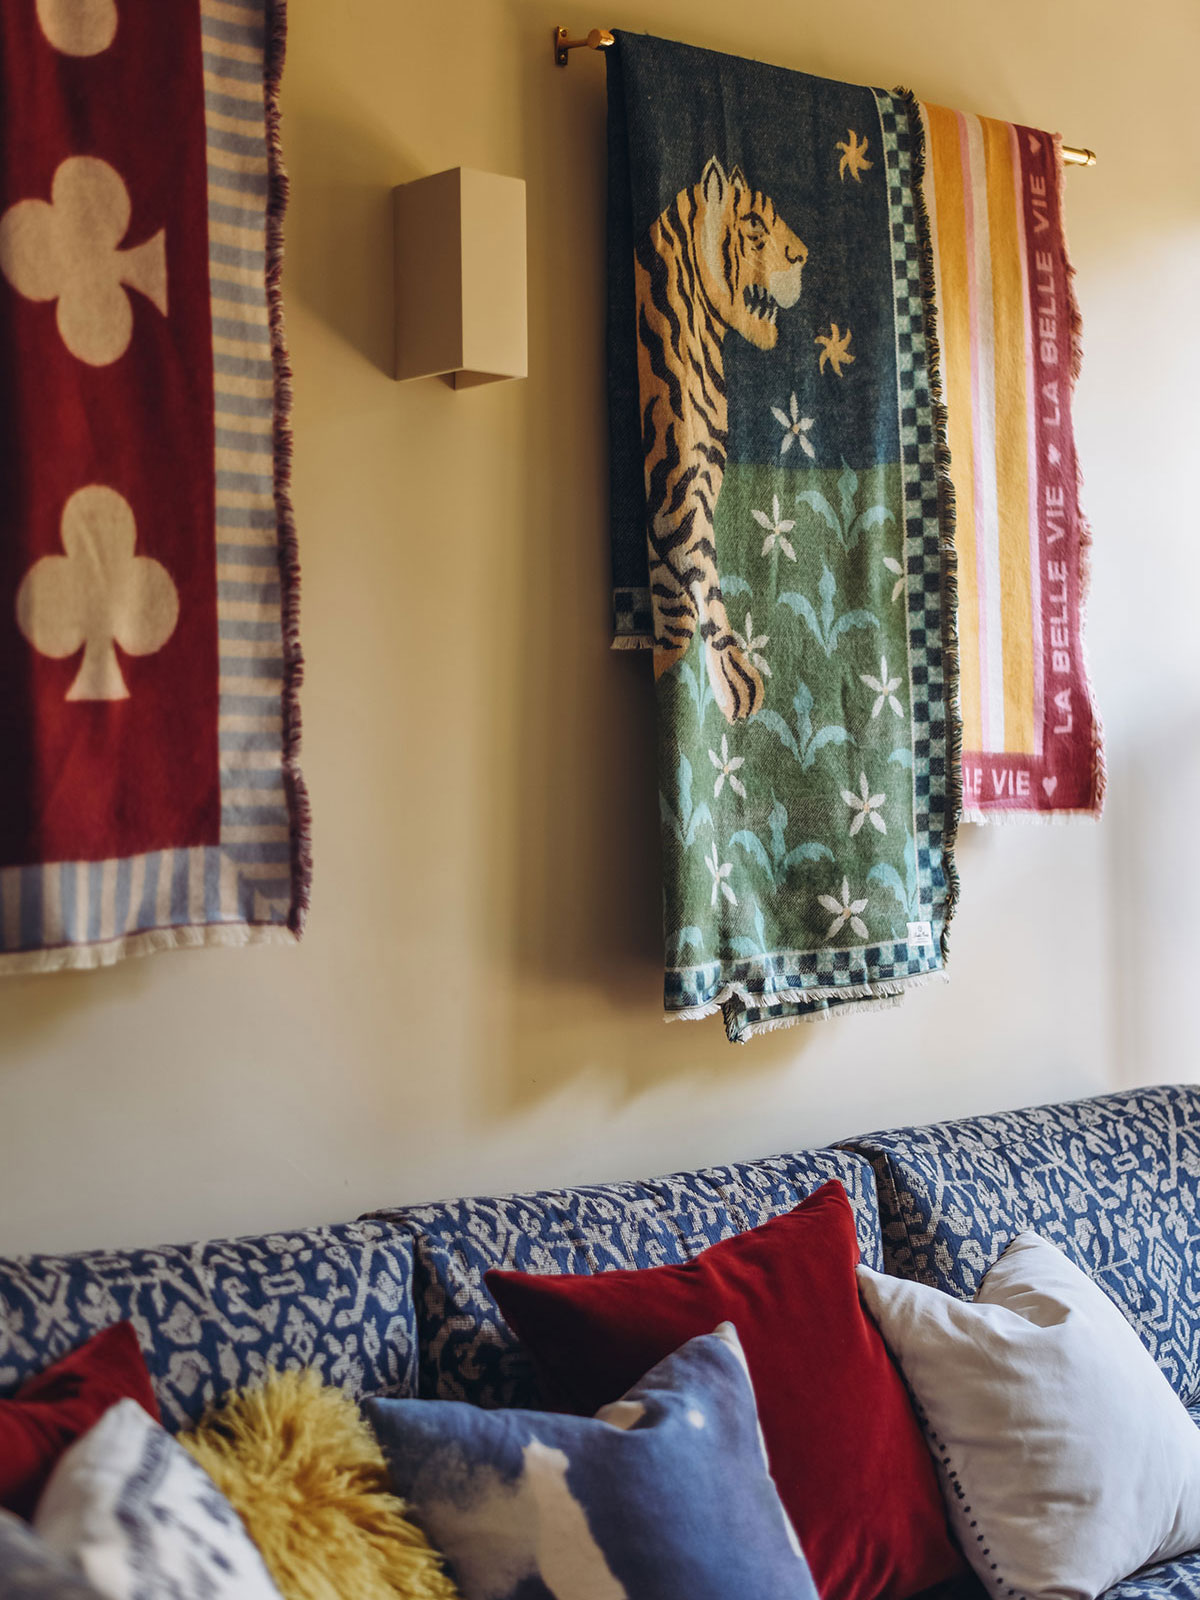
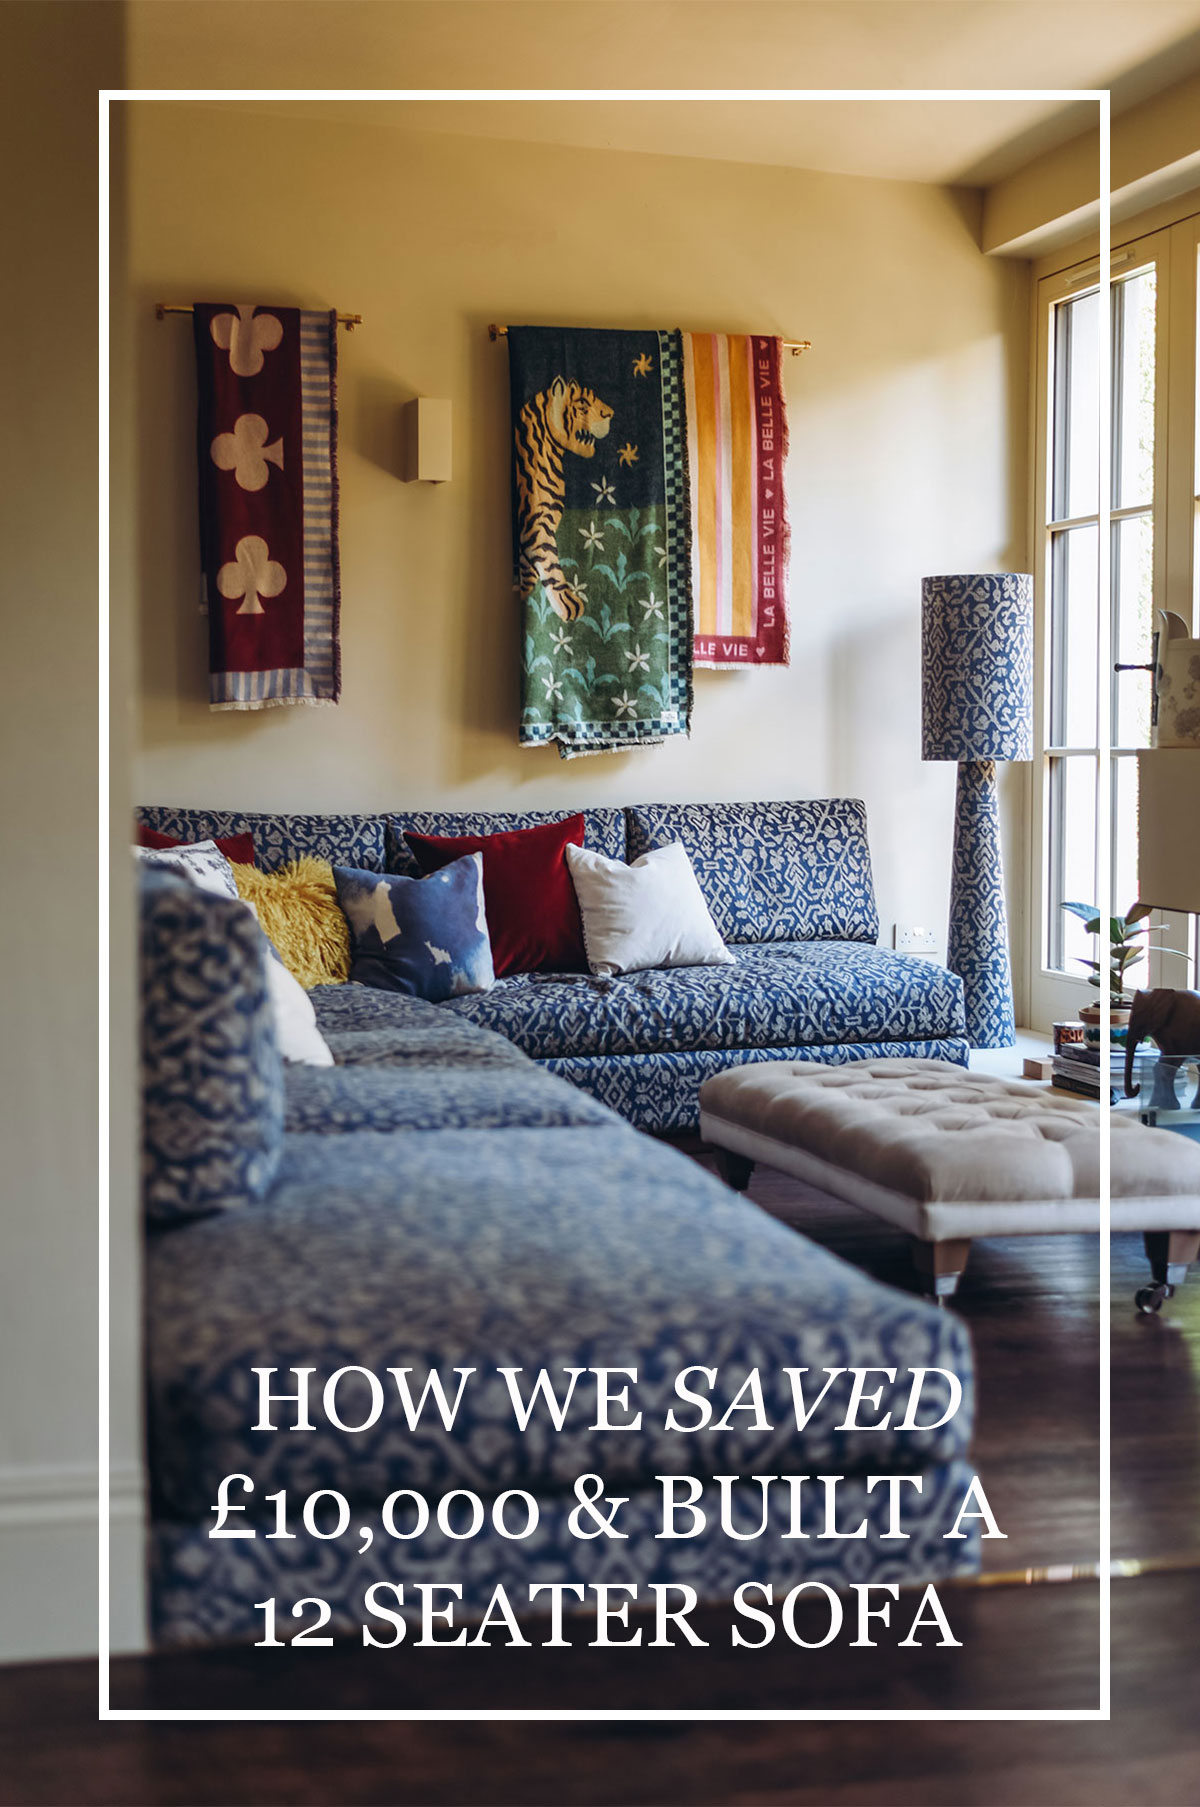
I dressed the walls with these brass rails and cosy throws which serve a dual purpose – wall art as well as blankets for sofa snuggles with the family.

THE CUSHIONS
The cherry on top. We opted for feather wrapped foam inners and those babies are SUBSTANTIAL. They are plush and weighty (a pain in the butt to wrestle into the covers) and look so good. I got quotes from various places but settled on these guys who did such a wonderful job and were super accommodating of my many, many questions. On Lee’s advice, the back cushions are wedge shaped owing to the fact that our ‘sofa’ back is the wall. Highly recommend.
Ph. Alison & Douglas Gibbs
HOW WE SAVED £10,000
With custom solution quotes coming in between £12,000-15,000 we managed to save a CHUNK. Sure, the sofa was still expensive but bear in mind that it is huge measuring 4.2m by 2.2m.
TIMBER
£0 (main frame leftover from house build)
£40 (internal frame 2x4s)
HARDWARE
£9.50 (screws)
£21.80 (staples)
£33 (zigzag spring & tacks)
TOOLS
£55 (pneumatic stapler)
£0 (circular saw, air compressor, hammer, drill driver, etc. we already had)
FOAM & FABRIC
£97.50 (foam)
£22 (wadding)
£19 (hessian)
£0 (fabric – so fortunate to be able to secure this FOC through a work collaboration)
CUSHIONS
£1520 (feather wrapped foam cushions & covers)
TOTAL
£1817.80
For me, this conversation pit is absolutely a dream come true. It took us around a month to complete with some help from the husband on the main frame on evenings and weekends the first fortnight and then pretty much 2 weeks of me working solidly on the upholstery and internal frames.
One hundred percent worth it for me. What do you think?

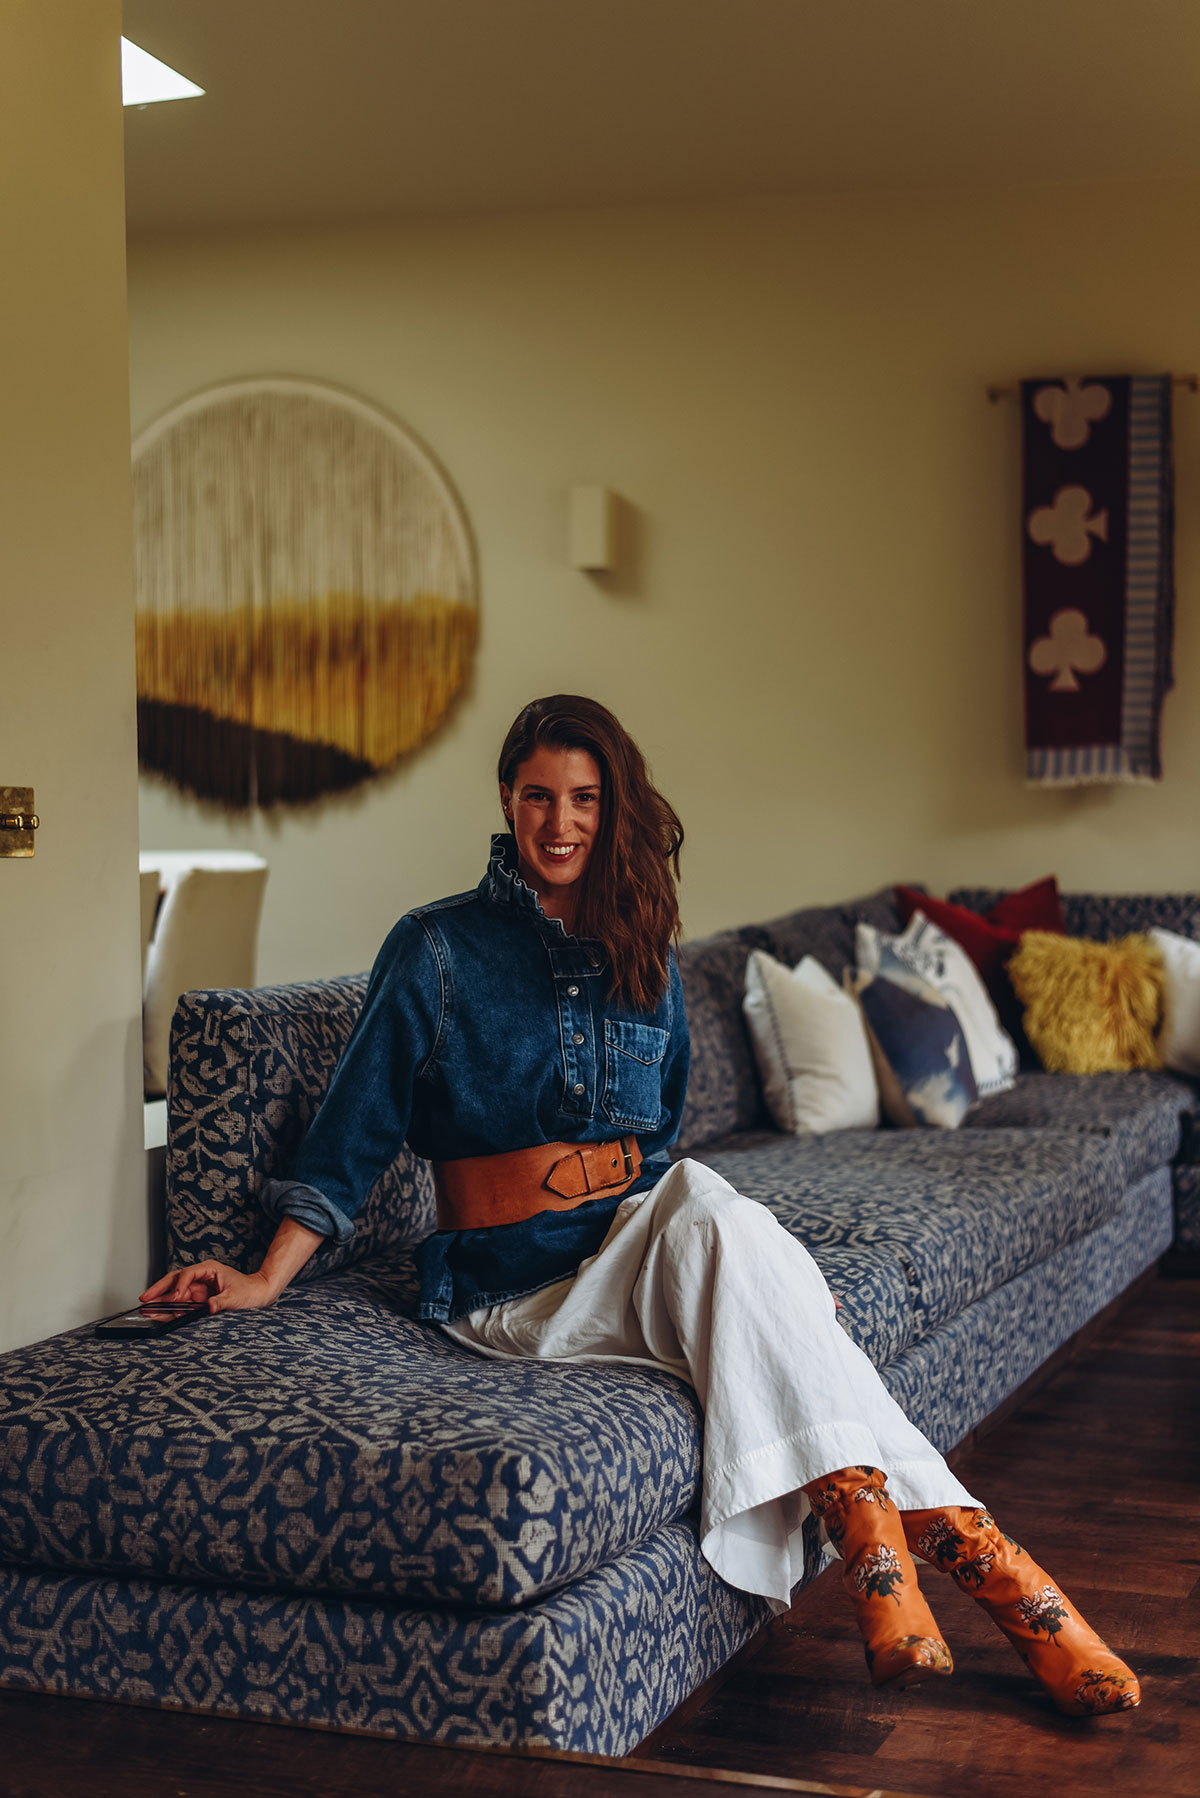
OUTFIT DETAILS
Cyrius shirt – Balzac
skirt – & Other Stories (old)
belt – Ted Baker (old)
Lila boots – Tory Burch (old)
ROOM DETAILS
Cusco Indigo fabric – Warner House
cushions & covers – Cushion Supplier
Antique French Oak floor – Karndean
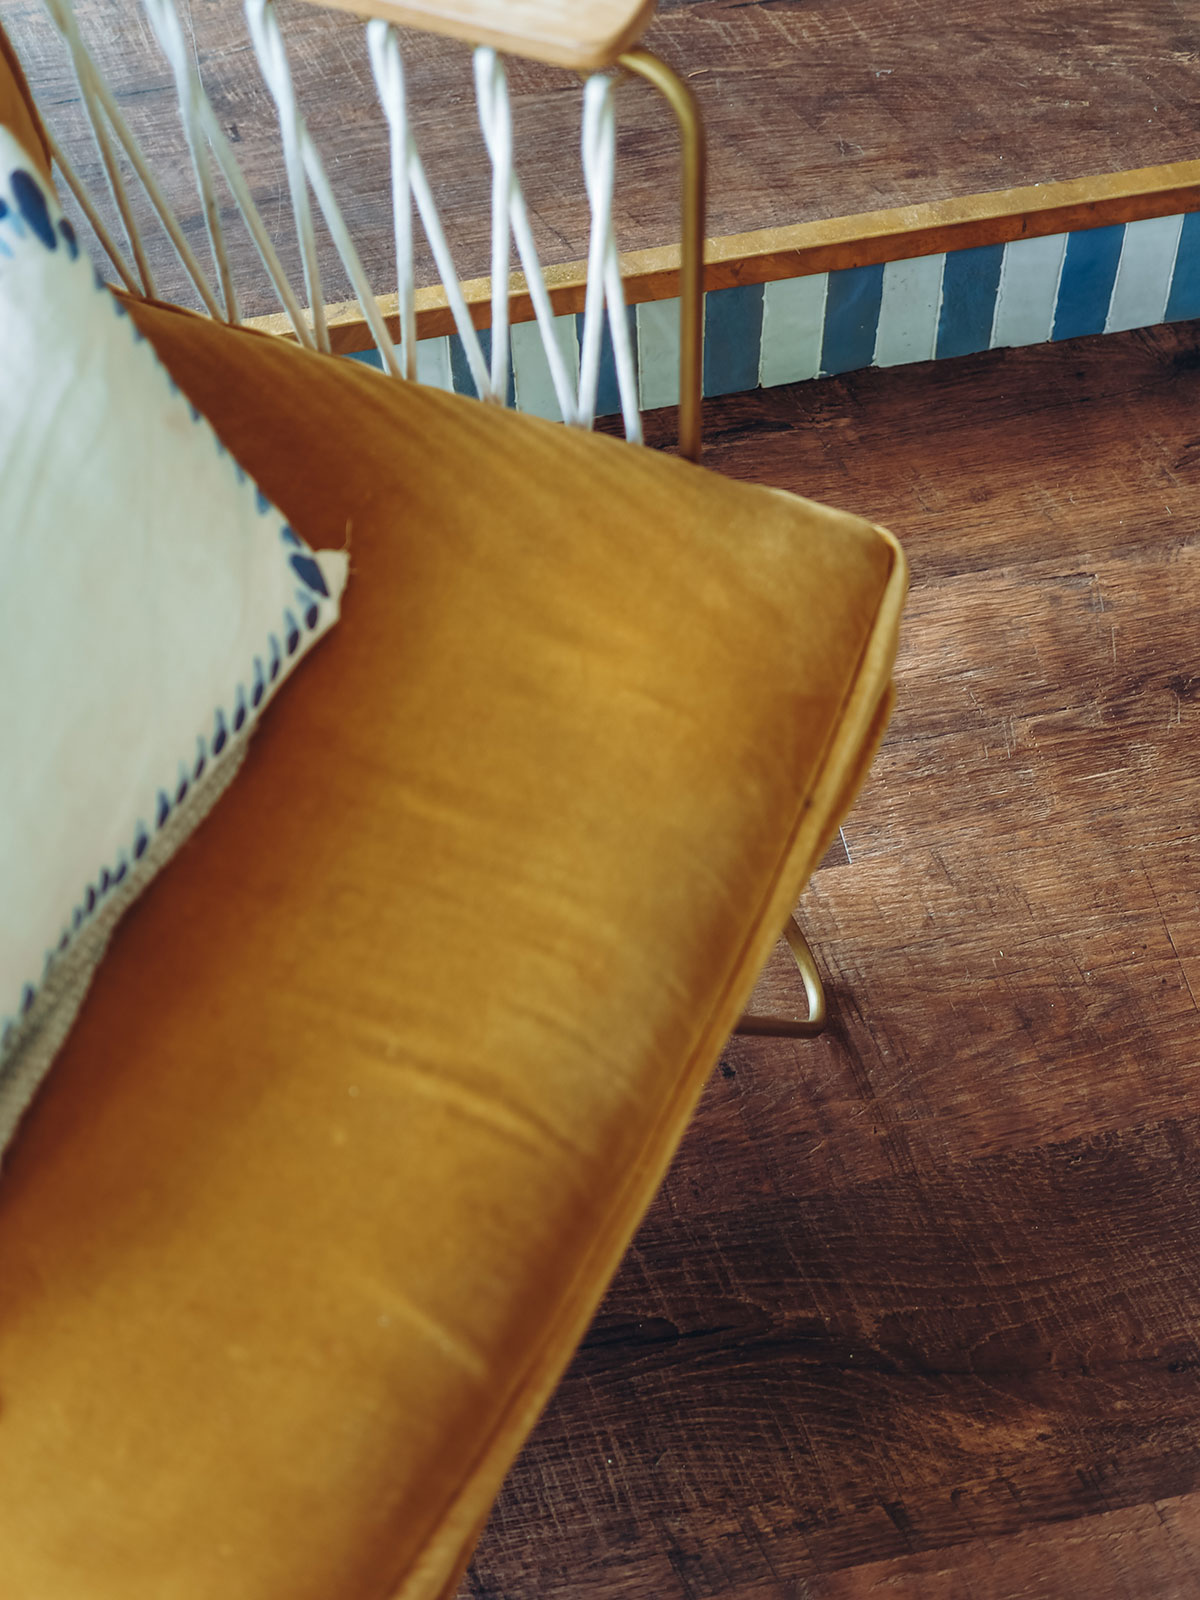
Croisette armchair – Honore Deco
footstool – Furniture Village
Silent White Deep paint – Little Greene
Foco Three bio fire – Bioethanol-Fireplace.co.uk
Frame tv – Samsung
throws – Anthropologie
brass rails & end brackets – Yesterhome
tartan tray – Addison Ross
snake plate – Gunia Project
plaster wall lights – Cotterell & Co
unlacquered brass toggle light switches – The Socket Store
lavender & white bejmat tiles – Otto Tiles
This feature contains affiliate links and gifts.


Absolutely AMAZING!! All that work was certainly worth it!
Author
thank you 🙂