
Home baked sourdough has changed my world. And it will change yours too. No doubt about it. If you can get someone else to make it for you… definitely do that. Otherwise, if you like a project and have some time on your hands, then this post is for you. I promise, once you get the hang of it, it really is pretty straight forward.
Here is a list of everything you need to get going and please scroll down for the sourdough starter instructions followed by the recipe for the loaf… I made an IGTV video because some things are just better shown in person (the blooper reel intro offers a good indication of the level of the challenge). Good luck my friends. Truly.
You will need…
At least ten days
Kitchen scales
Measuring jug
2 large (very clean) tubs/jars
Metal spoon
Wooden spoon
2 large mixing bowls
2 tea towels (or muslin cloths)
1 large casserole dish with lid (this size should be fine)
Many kilos of strong white bread flour (I use this one)
3 tsp salt
Tap water

Let me start by saying that this is your modern day tamagotchi right here – this baby is going to need constant feeding and attention and, if you neglect her, she will die. I have a friend on his fourth. He has stopped naming them after losing Jacinda and Lesley…
Thanks go to Bluebellgray for teaching me all about the art of the sourdough starter – these instructions match Fi’s to the letter so click through to her Sourdough highlight on Instagram for a good look at the starter in her various stages and you can see mine looking nice and healthy in my video (at around 1 minute 30 seconds in).
SOURDOUGH STARTER
Ingredients (Makes enough for 2 loaves at a time)
strong white bread flour
water
DAY ONE
Add 100g of flour and 100g (or 100ml, same thing) of luke warm water to a very clean tub or jar (I actually use an old ice cream tub and switch between that and a big mayonnaise jar – both of which I get super clean in the baby steriliser). Give it a good mix with a sterile metal spoon and leave the lid ajar – do NOT close it. Leave her well alone for 48 hours to get going. I sit mine of the kitchen window ledge where she gets the morning sun and she rather likes that.
DAY THREE
Hopefully by now your starter has grown and begun to bubble. She’s hungry. Give her a good stir (always with a really clean metal spoon) and pour half away. Yep. You will soon realise this becomes an infuriatingly wasteful pattern. But it is the method. Add 200g of flour and 200g luke warm water and mix, being careful to scrape down the mixture from the sides of your container. Same deal as last time – lid ajar and 48 hours of rest.
DAY FIVE
She should be big and healthy and bubbly by now. And again you mix, pour half away, add 200g of flour and 200g luke warm water and mix. Transfer her into your second super clean container today too – you want to avoid any bad bacteria forming so it is considered good practice to do this every few feeds. Lid ajar and this time just 24 hours of rest.
DAY SIX
Mix, pour half away, add 200g of flour and 200g luke warm water and mix. Lid ajar and 24 hours rest.
DAY SEVEN
Mix, pour half away, add 200g of flour and 200g luke warm water and mix. Lid ajar and 24 hours rest.
DAY EIGHT
Mix, pour half away, add 200g of flour and 200g luke warm water and mix. Lid ajar and somewhere between 4 and 12 hours rest. I realise this is ambiguous. You really need to get to know this girl. And you need to know when she is active and bubbling most prolifically and when she is more dormant. Figure out her rhythm and use her when she is most active. For me that is around 12 hours post feed. And if you are not sure, take a teaspoon of starter and drop it into a cup of luke warm water – if it floats you are good to go, if it sinks you are in trouble.
DAY EIGHT/NINE
We bake. Hurrah! Scroll down for the sourdough loaf recipe…
WHAT NEXT?
Post bake you need to decide if you plan to bake daily, in which case continue the daily discarding/feeding schedule with an extra feed before you bake, or if, like me, you will be a weekend baker. I personally find this easier because the starter lives in the fridge for most of the week and does not require any attention UNTIL 36 hours before you plan to use her. Then you need to bring her out and keep her at room temp (I give her a clean vessel again too), feed/discard three times roughly 12 hours apart and then bake. These starter quantities create enough to bake two large loaves at a time – I have one fresh and either bake, slice and freeze the other OR leave the second loaf to slow prove in the fridge for an extra day (ok, sometimes two) and then bake to enjoy fresh.
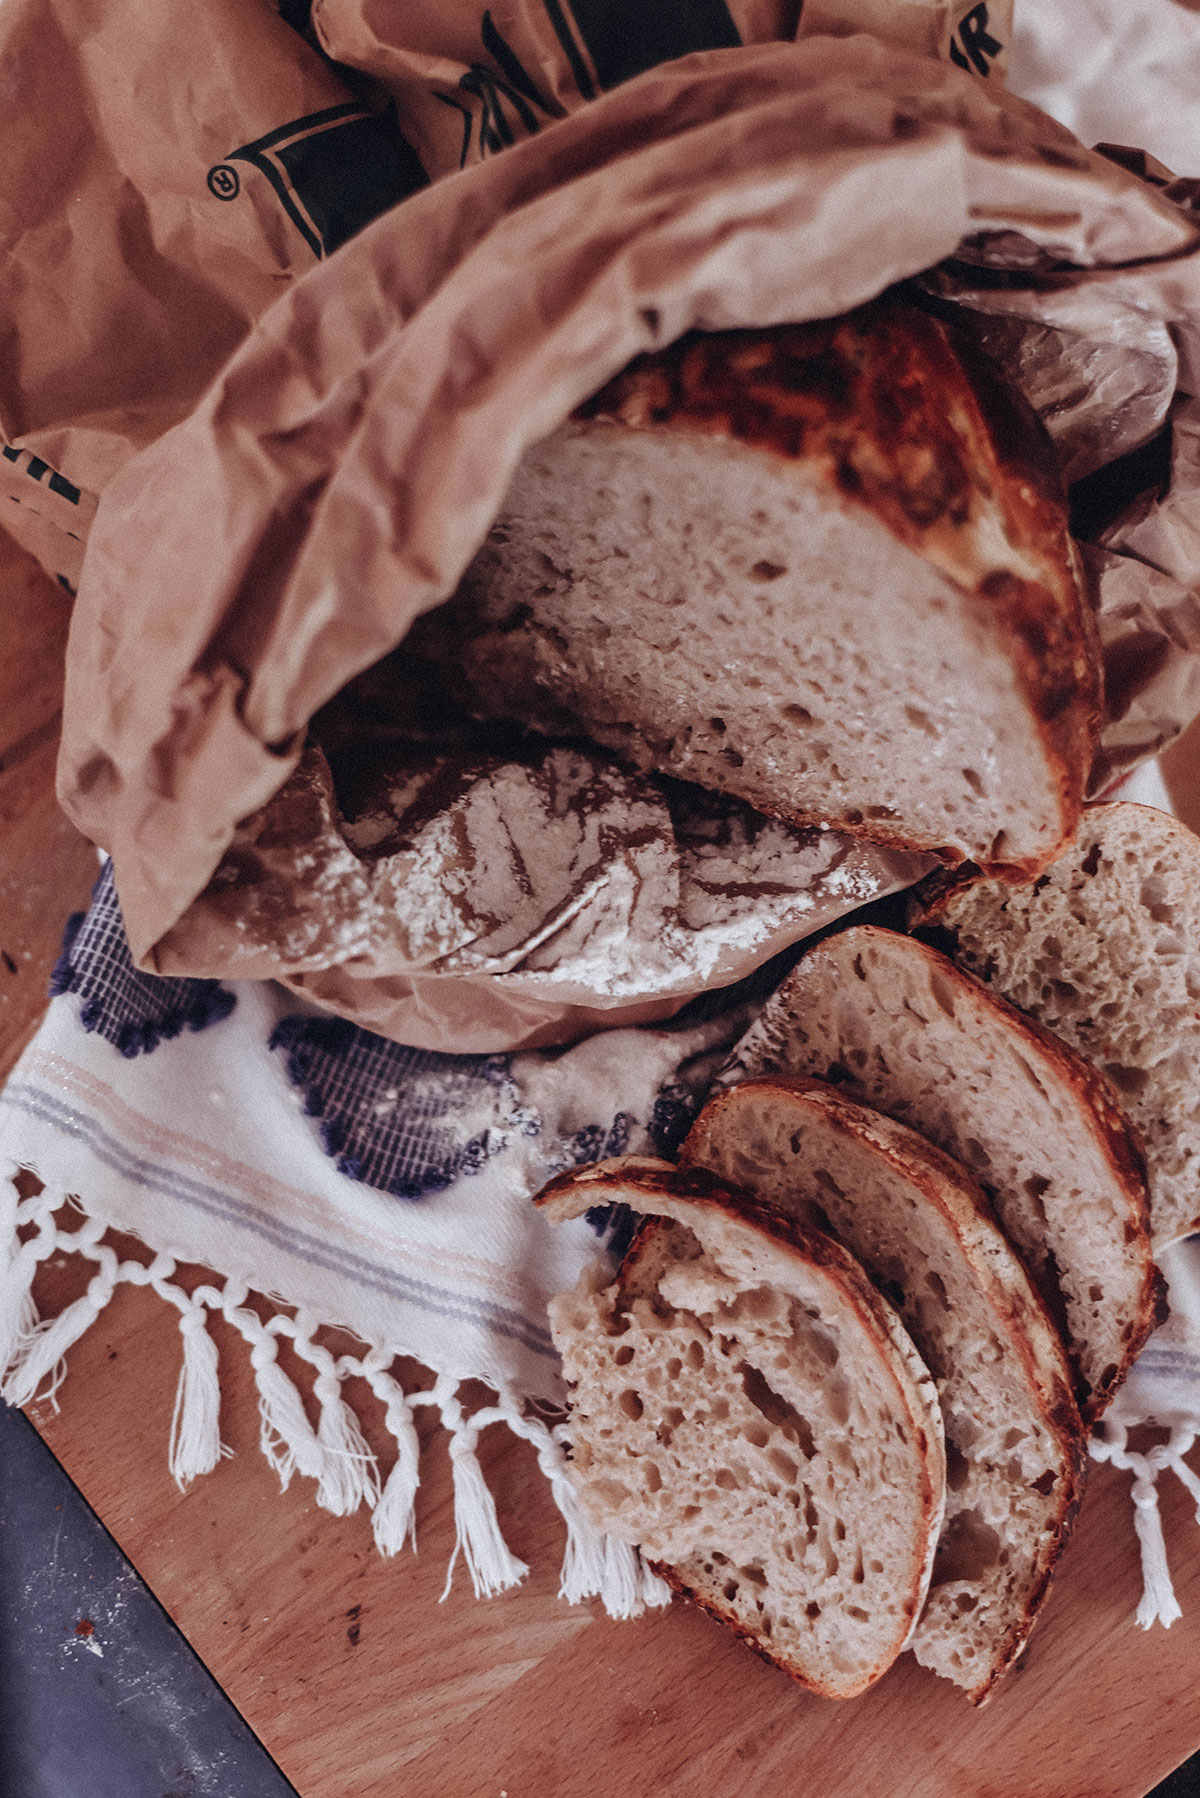
And now, finally, the reward. Healthy, beautiful bread to be enjoyed by all. I am certainly no pro, as evidenced in my video, but I did find it very helpful indeed to have the step by step visuals and coaching from my friend Lil so I have tried to share as much as I can below but really…
SOURDOUGH RECIPE
Ingredients (Makes 1 large loaf)
220g active starter
630-650g strong white bread flour
380ml luke warm water
20ml luke warm water
3 tsp salt
DAY ONE (5 HOURS – I have noted timings below but of course adjust to your own start time)
2PM (10 mins)
In a large clean bowl mix the starter with 380ml water and 630-650g flour using a wooden spoon. Everyone is different of course but I tend to find 630g gives an airier dough, however, my scales are ‘vintage’ and perhaps not particularly accurate. I also stopped using them some time ago subbing the scales for coffee cups – perhaps part of the problems I occasionally experience with differing success levels… The dough is rough around the edges, unlike a ‘normal’ bread dough, at this stage, more like a scraggy mess. Cover with a tea towel (or clingfilm) and leave to rest at room temperature for 45 mins.
3PM (10 mins)
Now things get VERY messy. Remove your jewellery kinda messy. Add the salt and the further 20ml water and get in there and mix with your hands. The dough should start to become a lot more elastic now as you really feel the salt begin to react with the dough. At this point I transfer to new, clean, lightly oiled bowl and leave to rest at room temperature for another 45 mins. (That scraggy dough is a nightmare to wash off by the way – do NOT ruin your dish brush. Instead, leave the dirty bowl to steep in hot water and it will simply rinse off later).
4PM (5 mins)
Stretch and fold the dough 8 turns with wet hands. I will not even attempt to explain it – just watch the video (this stage begins at around 8 minutes in). Cover with a tea towel and leave to rest at room temperature for 1 hour.
5PM (5 mins)
Stretch and fold the dough 8 turns with wet hands. Cover with a tea towel and leave to rest at room temperature for 1 hour.
6PM (5 mins)
By now your dough should really be increasing in volume… Stretch and fold 8 turns with wet hands. Cover with a tea towel and leave to rest at room temperature for the final 1 hour.
7PM (10-25 mins depending how much time you have)
Gently loosen the dough from the edges of the bowl and tip him out onto a well floured surface. You want the surface that has been gathering tension on the bottom of your bowl to now be facing upward and then with floured hands tuck under and turn the dough into a boule shape. Again, please watch the video (this stage begins at around 10 minutes 30 seconds in). Leave for 20 minutes bench rest if you have time. I never do… but anything helps. Then flip him over and go in for the final stretch and fold – this one is completely different – you know what I am going to tell you? I show you how I do it in the video (at 12 minutes in). Now lift him into the bowl lined with a clean floured muslin cloth (or tea towel). Cover with another tea towel and leave him to rest in the fridge overnight. Wish him a good night’s sleep.
Because I make two loaves at a time I tend to leave the second guy in the fridge for an extra 24 hours (sometimes longer) meaning I can bake fresh bread two days running…
DAY TWO (2 HOURS)
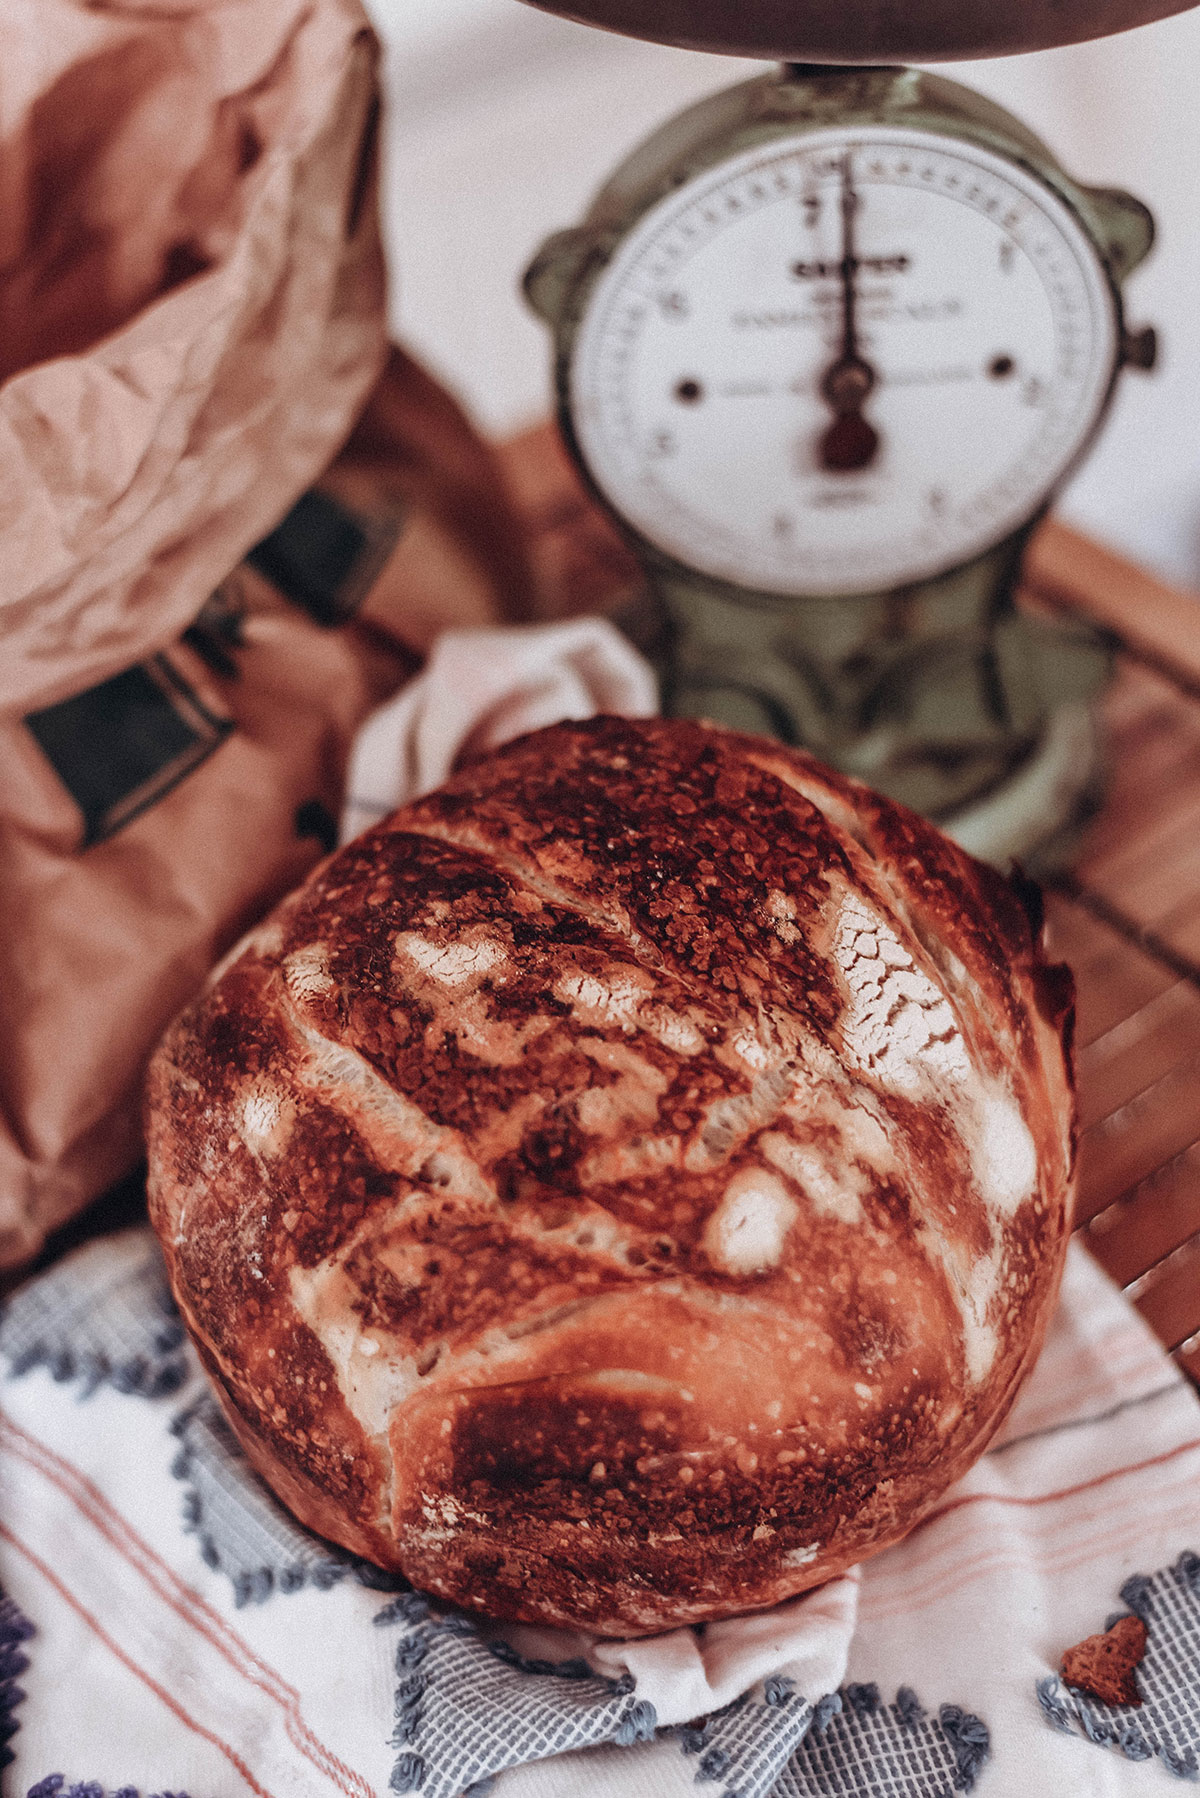
Preheat a fan assisted oven to 220C with the casserole + lid inside. You want it to get really hot. Expect to burn yourself at one point or another (but hopefully not your boob… don’t ask). Flour the boule lightly then gently tip him out into the hot casserole dish. You want the tight surface from the bottom of the bowl to now be the top of your loaf. You can refer to the video again here (at around 14 minutes 30 seconds in). Score deeply 3 times (I find a steak knife works well). I do not do sourdough art – simply put, I am not good enough; at art yes, I have an honours degree in painting, at bread, no.
Into the oven now for 35 minutes with the lid on followed by a further 10 minutes in the oven with the lid off. So 45 minutes in total. These timings give you a crust but not a crazy crust – the kind of crust a toddler can handle.
When his time in the oven is up simply turn him out onto a cooling rack for at least 1 hour rest. I do not possess a ‘cooling rack’ but a cool oven shelf on the worktop seems to do the trick. Honestly even 2 hours rest still gives you warm bread and, in fact, it is a little easier to slice.
And then finally, FINALLY, reap the rewards of your labour. Enjoy. I mean, this is the best thing since… wait… I’ll spare you my crumby jokes.
Do let me know if you try it and feel free to slide into the comments here or my DM’s on Instagram if you want to chat sourdough – I cannot promise to be any help whatsoever but I do like to try.

This post contains affiliate links and gifts
OUTFIT DETAILS
blouse – My Wardrobe
shorts – Next
sandals – LK Bennett
Steve Madden sunglasses – TK Maxx
Estee Lalonde long flat snake chain – Daisy Jewellery


